


Manage server with Webmin
Most system administrators are used to performing routine operations using the console. On Linux, the bash shell is more often used, and on Windows Server there is a flexible and convenient PowerShell tool. On the one hand, the console is very convenient since you can automate many things by writing appropriate scripts. On the other hand, many commands can be quite long and difficult to remember.
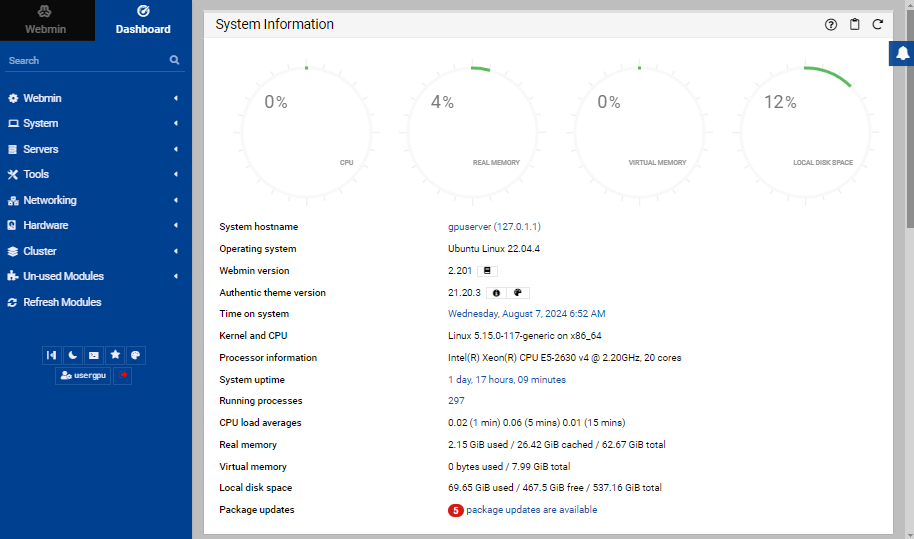
In addition to the console, there are other ways to manage the server, such as Webmin. This is a control panel that allows you to control the server directly from the web browser. When Webmin is installed on the server, most of its parameters can be checked and changed without opening the console. Webmin also allows you to draw load graphs and get a global view of running processes and services.
Installation
This tool isn’t included in the standard Ubuntu repositories, so the easiest way is to use the official script, which will add a third-party repository after downloading the GPG key. Download the script:
wget https://raw.githubusercontent.com/webmin/webmin/master/setup-repos.shRun it:
chmod +x setup-repos.sh && sudo ./setup-repos.shNow you can install Webmin using the standard apt package manager:
sudo apt -y install --install-recommends webminQuick start
Security
Immediately after the installation is complete, Webmin will run on the standard port 10000. This is a potentially security vulnerability, so it is recommended to change it to another one right away. To do this, open Webmin - Webmin Configuration - Ports and Addresses, and in the Specific port column, change it to any other:

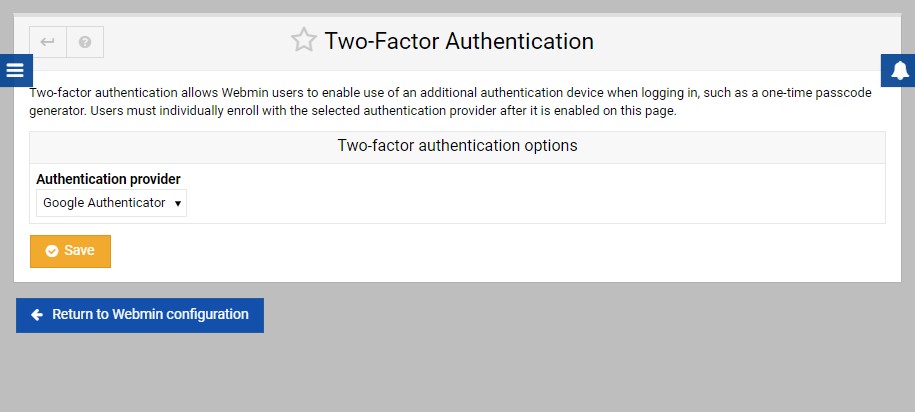
Authentication in Webmin is performed using the Linux user login and password. For additional security, Webmin supports the ability to connect two-factor authentication (2FA). We recommend that you set it right away in the Webmin - Webmin Configuration - Two-Factor Authentication section:
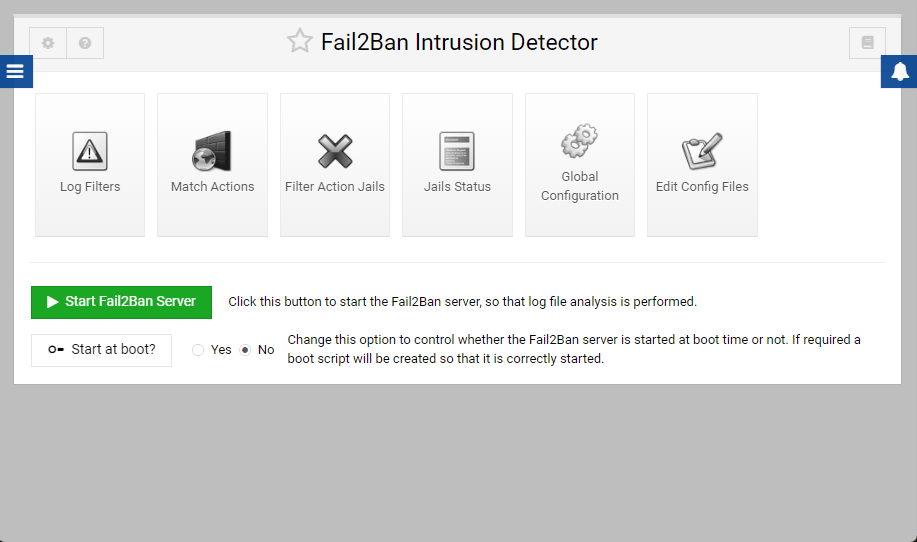
Don’t forget that the standard SSH connection method remains available even after Webmin installation, and therefore remains a potential target for attackers. We discussed this issue in detail in the article Prevent SSH-bruteforce in Linux. Webmin allows you to install and use the same tool, Fail2ban, from the web interface.
Look in the Un-used modules - Fail2ban Intrusion Detector section and click the Install Now button. The system will warn you that several more dependent packages will be installed along with Fail2ban. After installing, you can manage server protection without using the console:
Before starting the Fail2ban server, it is recommended to look at the Match Action section and select the necessary regular expressions, based on which Fail2ban will check log files and block suspicious connections using the standard Linux firewall:

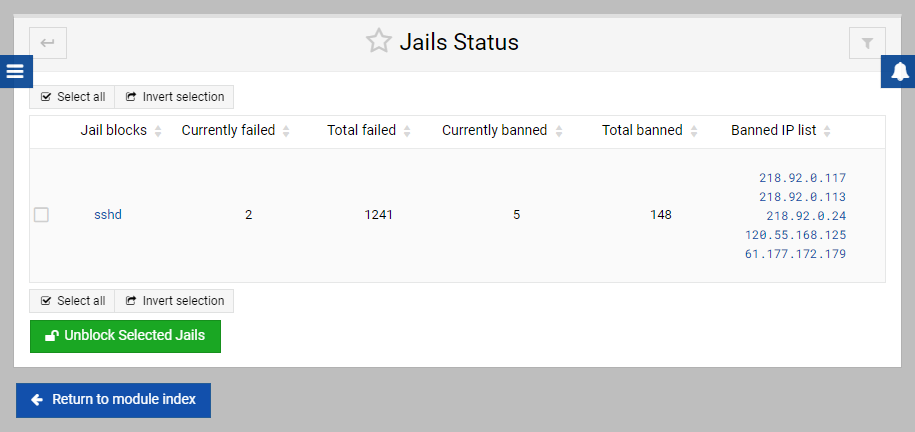
Immediately after Fail2ban is launched, the system will begin recording attempts by bots to guess credentials and block IP addresses of attackers:
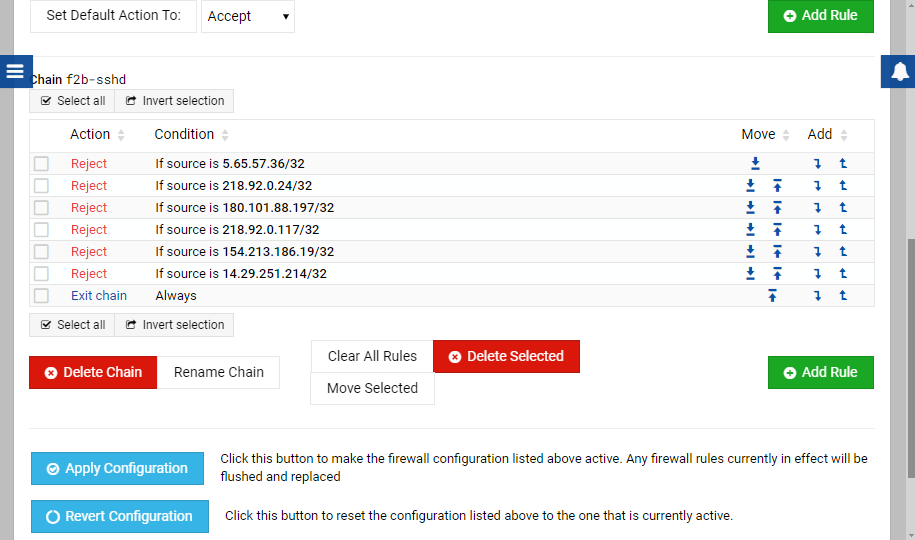
The operation of this security system can also be monitored in the Networking - Linux Firewall section. Here you can create custom rules, allowing or prohibiting connections:
Useful features
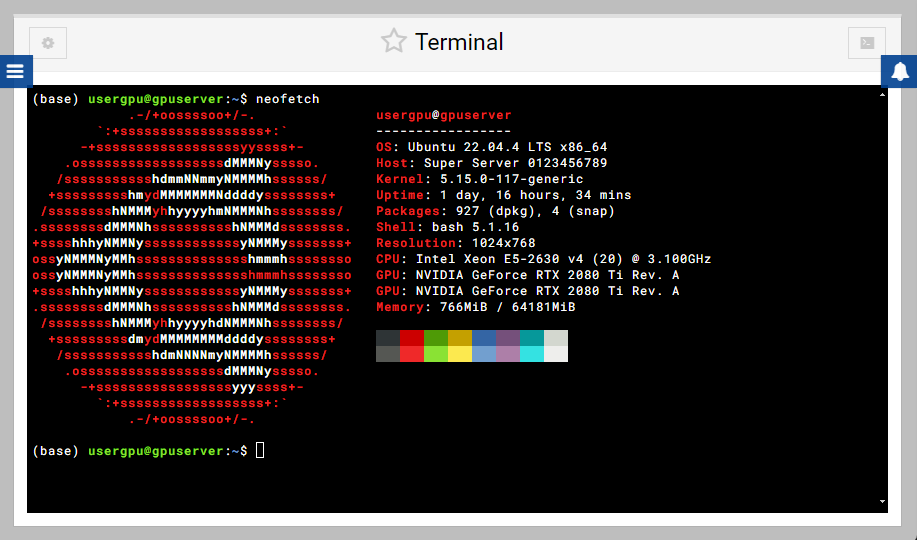
Now that you’ve taken care of security, you can pay attention to what exactly Webmin allows you to do with the server. Let’s start with the simplest and most relevant - the Terminal. With Webmin, you have the ability to access the server console without having to use any SSH-client. Go to the Tools - Terminal section, and now you can perform any service operations directly in the browser. This is very convenient if, for example, you have to use a public or someone else’s computer that does not have an SSH client installed:
The second extremely useful feature is the file manager, which allows you to manage files and directories on the server without the need to use additional software. For a server without Webmin installed, this usually meant using the SFTP protocol, which required the presence of an appropriate client, such as Filezilla (read more in our article File exchange from Linux). Here, file management occurs entirely through the web interface. To do this, open the Tools - File Manager section:
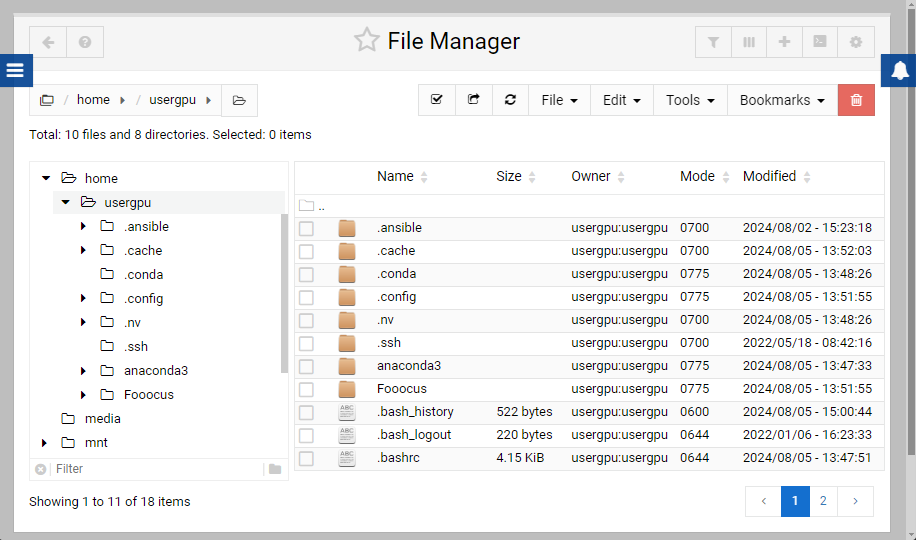
In addition to routine operations such as moving, copying, and renaming files, the file manager has an editor that allows you to easily view or edit text files. So if you need to edit configuration files on the server, you can do this without closing the browser tabs.
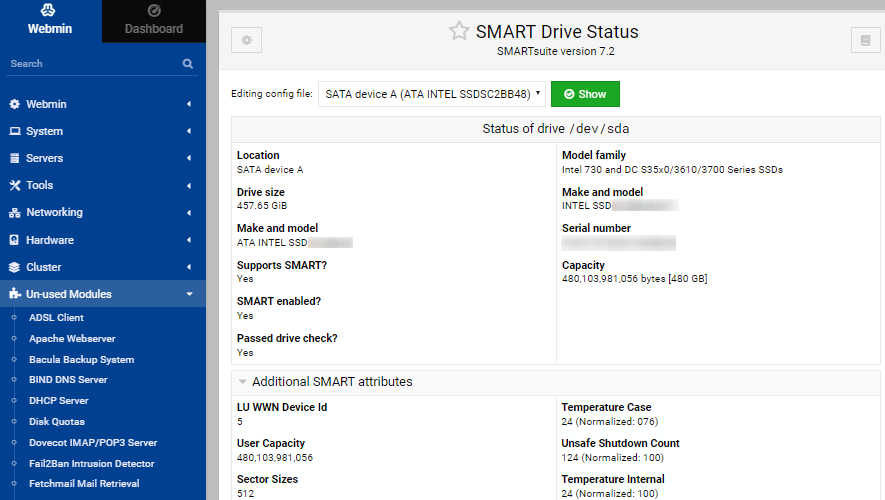
Another useful Webmin module is SMART Drive Status. It allows you to display service data of disk drives in a convenient form, as well as run self-testing with one click. Since the module relies on the smartctl utility as a data source, you need to install the smartmontools package:
sudo apt -y install smartmontoolsGo to the Un-used modules - SMART Drive Status section, and you can get comprehensive data on the disk subsystem. The S.M.A.R.T. (Self-Monitoring, Analysis, and Reporting Technology) system allows you to predict the failure of drives with sufficient accuracy, based on self-diagnostic data and controller logs:
Conclusion
Webmin is one of the most accessible and popular remote server control panels. Its advantage is that it is completely free and has open-source code. It is not without its shortcomings, but at the same time, it allows you to perform most of the usual operations without using the system console. When installing such a panel, it is important not to forget about security because it gives the user full control over the server operating system.
See also:
Updated: 04.01.2026
Published: 12.08.2024