


How to enable GPU rendering for Microsoft Remote Desktop on LeaderGPU servers
Some programs used in modern video editing, engineering design and 3D modelling require the use of GPU resources for fast rendering and displaying the image.
Massive software packages used in the Remote Desktop environment often require GPU rendering. Remote Desktop does not support this option by default. It must be enabled on its own; otherwise, launching rendering programs can lead to various errors related to the initialisation of DirectX or OpenGL GPU drivers.
How can this issue be resolved? To do this, you need to change the Group Policy on the server you are connecting to during your Remote Desktop session. In this tutorial, we'll show you how to enable GPU rendering on LeaderGPU servers.
To enable this option on LeaderGPU, you will need to do the following.
1. Connect to the remote desktop using the credentials that were sent to your email when ordering a plan in LeaderGPU.
2.
Scroll
to the bottom of the window, click on the magnifying glass (search) icon, and
then enter in the field: gpedit.msc 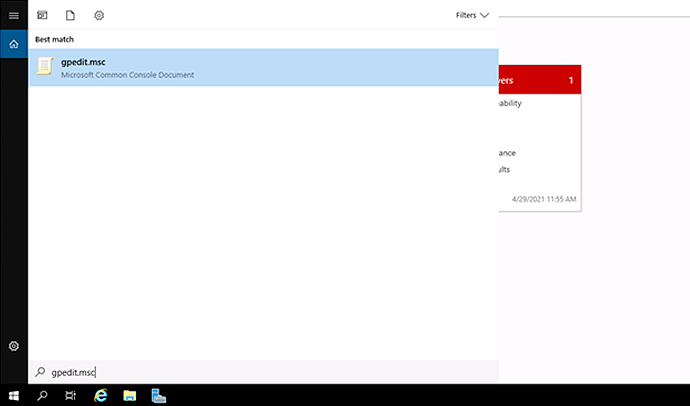
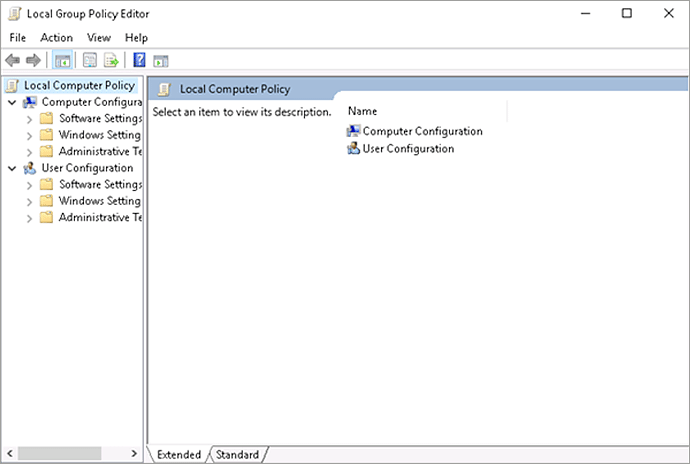
3. Press Enter. You will see the Local Group Policy Editor window.
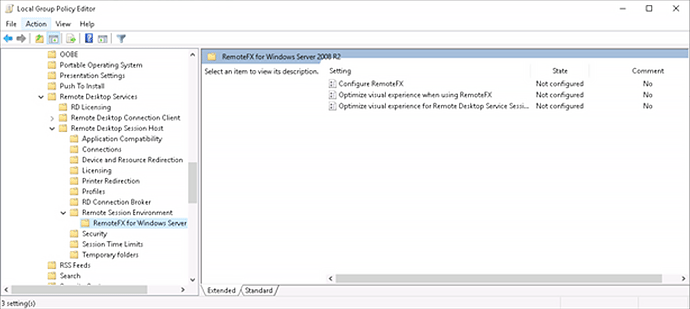
4. In the navigation window on the left, select the following path: Administrative Templates > Windows Components > Remote Desktop Services > Remote Desktop Session Host > Remote Session Environment > RemoteFX for Windows Server.
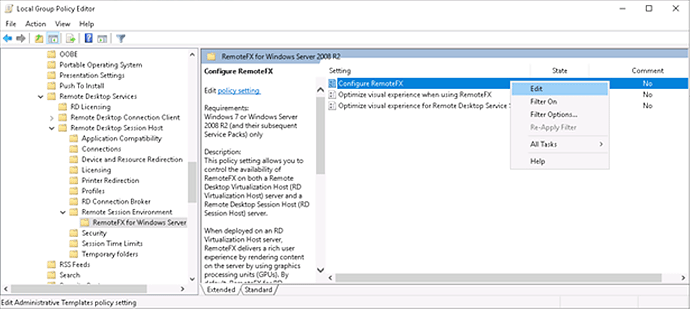
5. Select the Configure RemoteFX option and right-click on it. Click Edit:
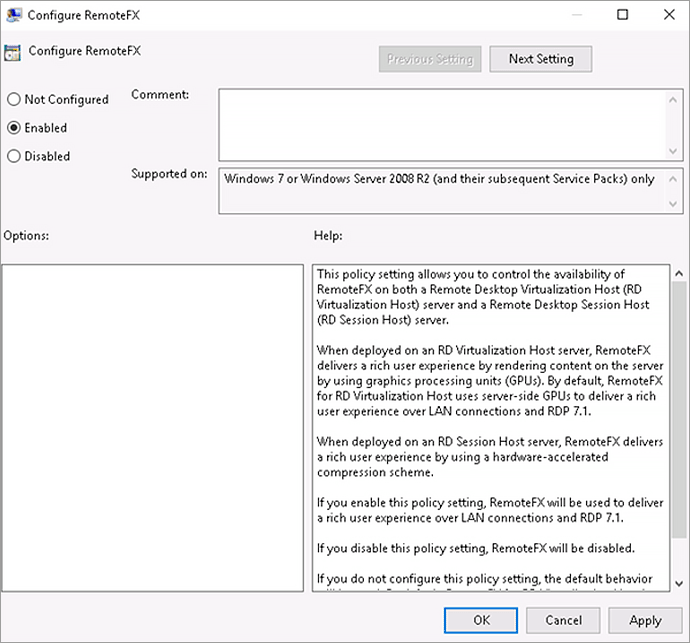
6. The Configure RemoteFX dialogue box appears. Click the Enabled option, then click OK.
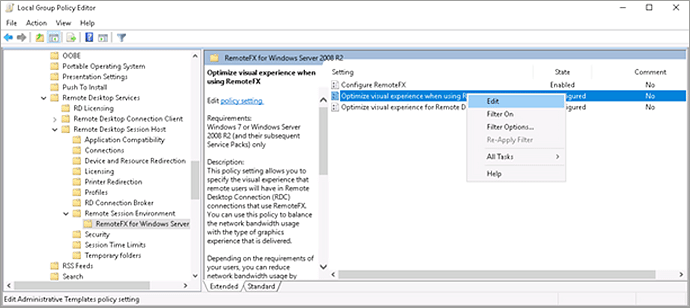
7. Right-click the "Optimize visual experience when using RemoteFX" entry, then click Edit.
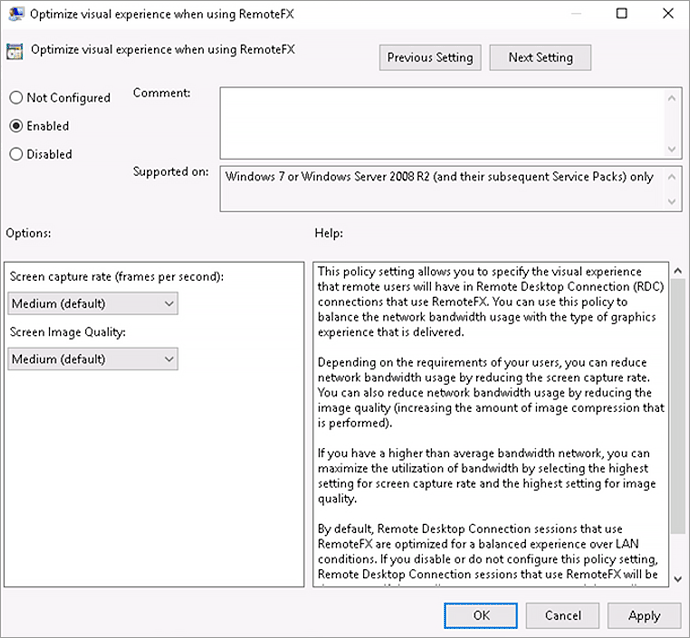
8. Repeat the process. Click the Enabled option, and then click the OK button.
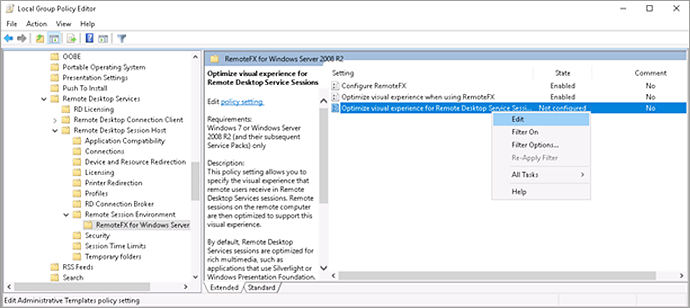
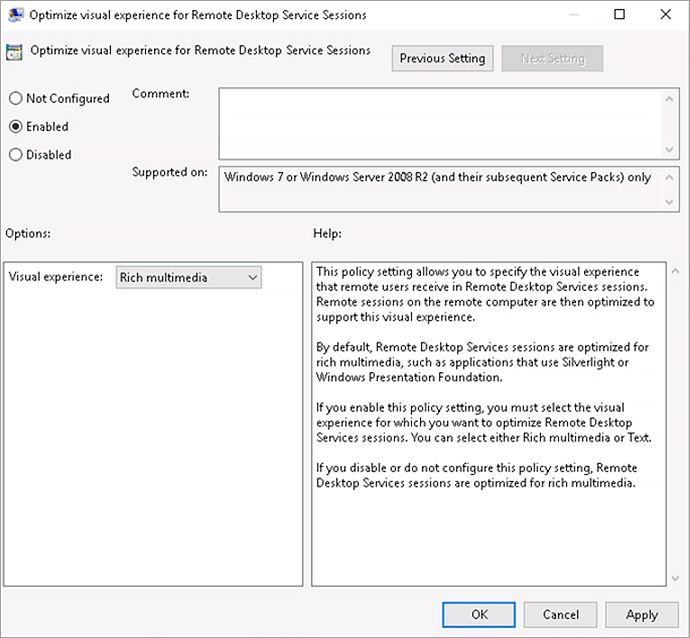
9. Finally, do the same for the "Optimize visual experience for Remote Desktop Service Sessions" item. Select Edit from the context menu:
10. Click Enabled, then click OK.
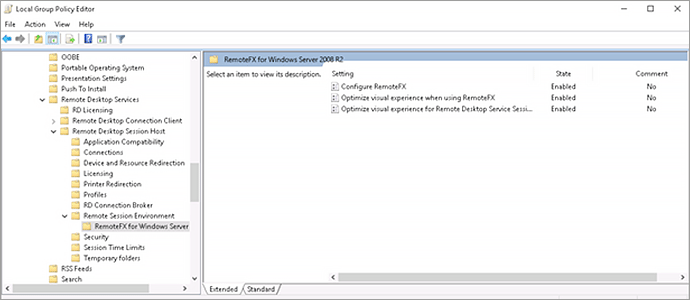
11. Make sure that all three points of group policies are now enabled.
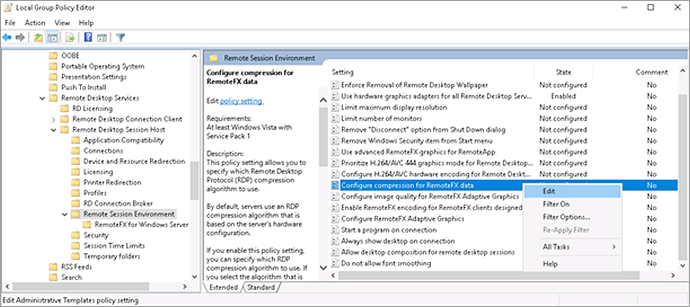
12. Select the Remote Session Environment item in the panel on the left.
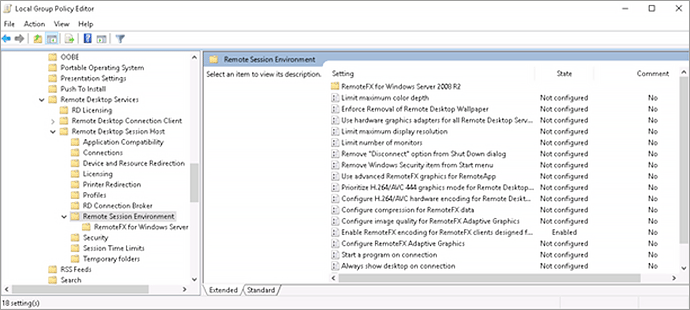
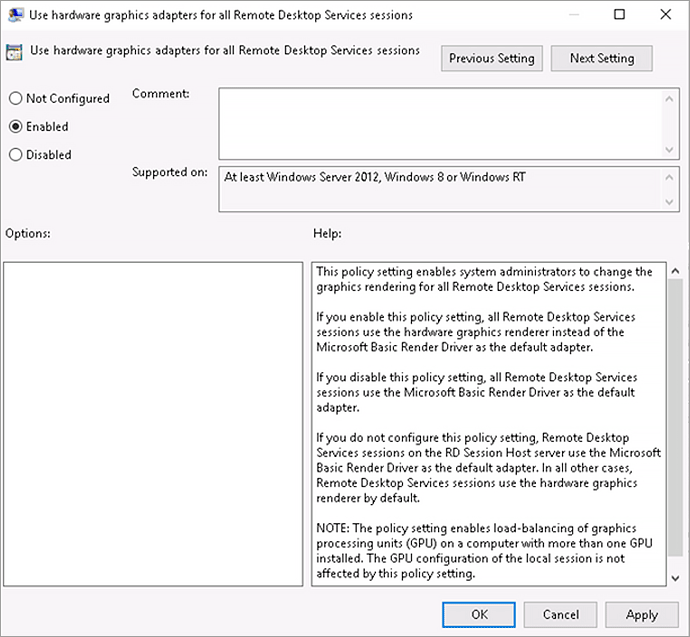
13. Right-click on the entry "Use the hardware default graphics adapter for all Remote Desktop Services sessions". Select Edit:
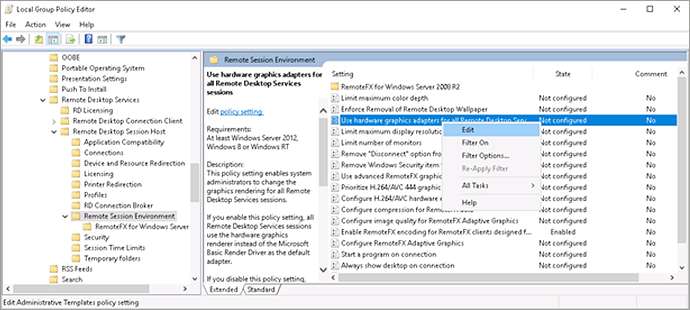
14. Click Enabled, then click OK.
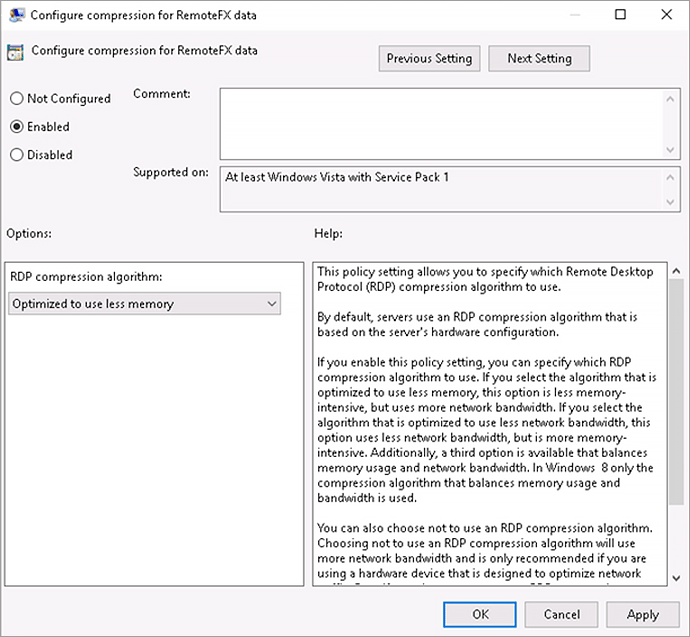
15. Look for the entry “Configure compression for RemoteFX data”, then click Edit in the context menu.
16. Click Enabled, then click OK.
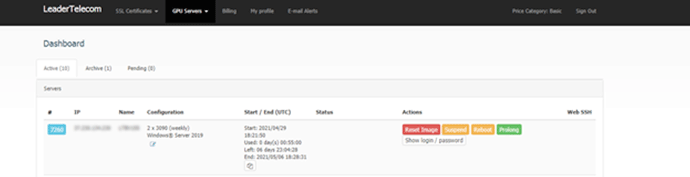
Done! Now you need to restart the server. This can be done in the LeaderGPU console using the Reboot button.
Updated: 04.01.2026
Published: 10.05.2021