


Securing RDP
The Remote Desktop Protocol (RDP) is an effective way to manage remote servers, but it isn’t as secure as we would prefer. Two factors typically interest attackers. The default connection port (3389) is rarely changed, and simple passwords can be brute-forced using pre-compiled dictionaries. There are two primary methods to protect your RDP connection from external attacks and decrease the risk of server hacking. In this guide, we will briefly walk you through how to establish each of them.
Set non-standard port
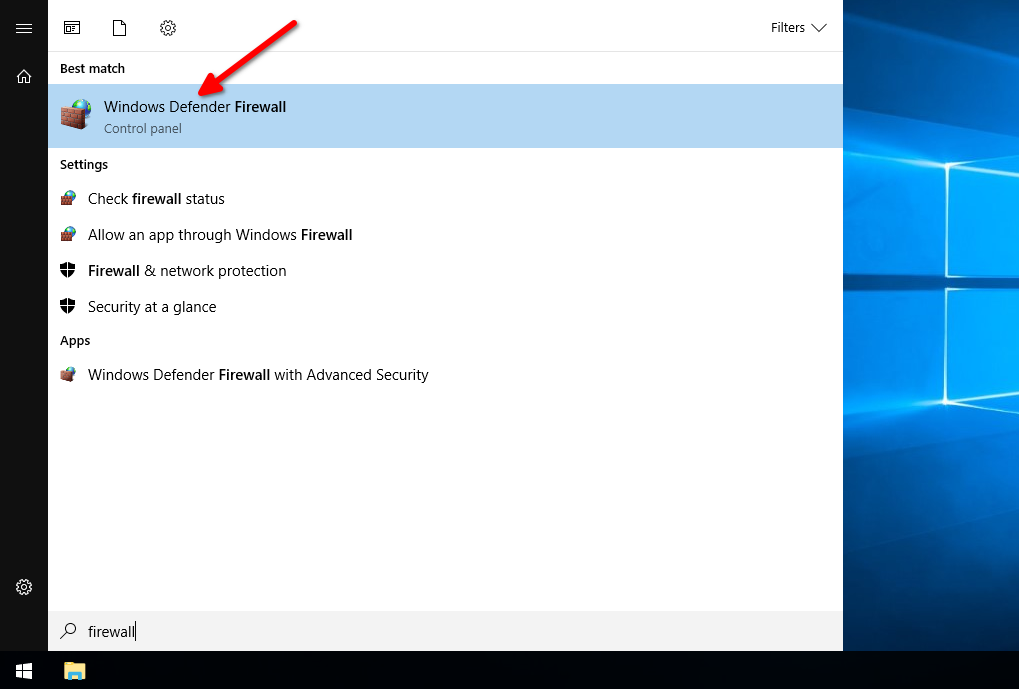
Before modifying the current configuration, it is important to enable connections on the planned port number. Failure to do so will result in the Windows Defender Firewall terminating the connection after changing the default RDP port. This will make it impossible to establish a connection and you’ll lose control of the server. Click on the Start menu and type the word firewall on the keyboard. Then click on Windows Defender Firewall:
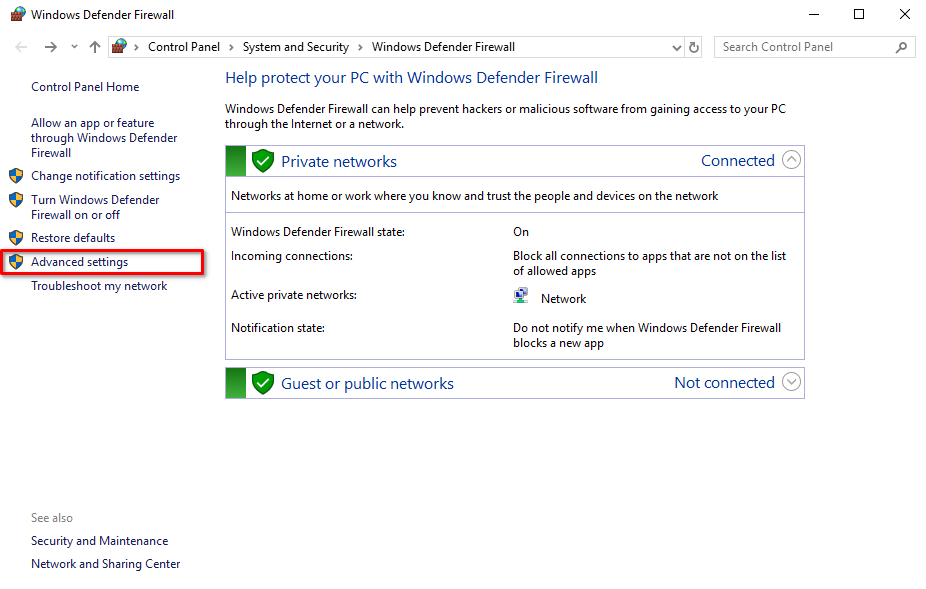
Choose Advanced settings from the menu on the left:
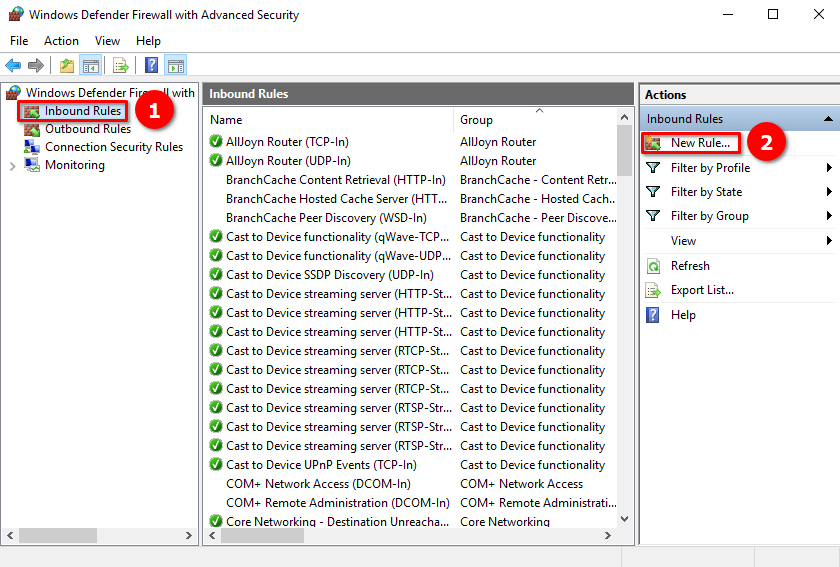
Click on Inbound Rules, then New Rule… :
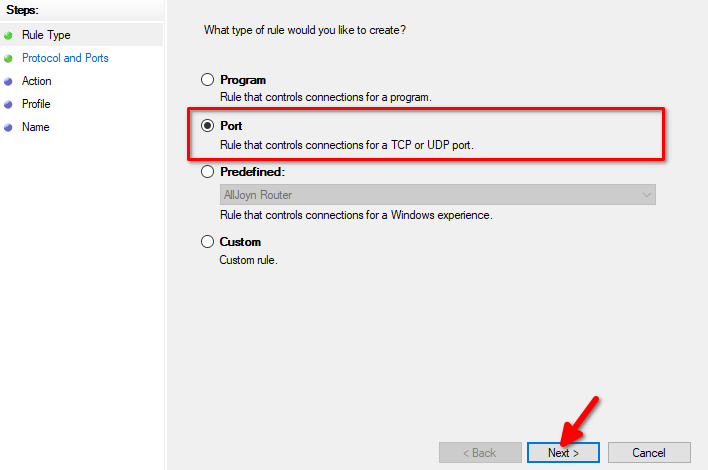
The easiest way is to create the rule for the desired port. Tick on Port and click the Next button:
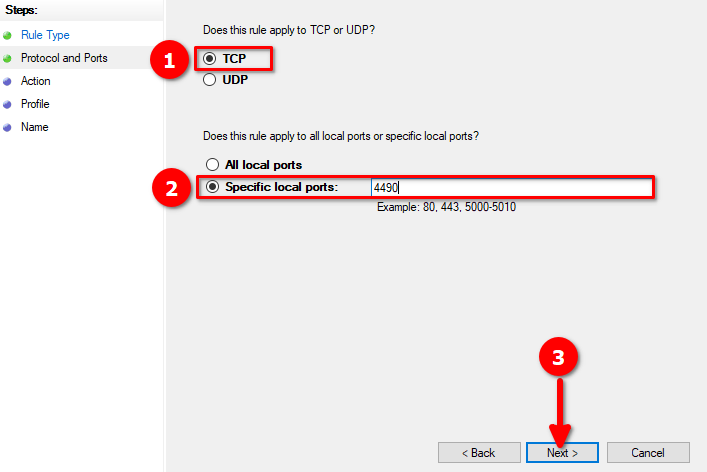
RDP operates using TCP protocol. Check the TCP box and specify the port for RDP. We recommend selecting the number from this range: 1024-65535. Tick on Specific local ports and type the number. For example we use port 4490:
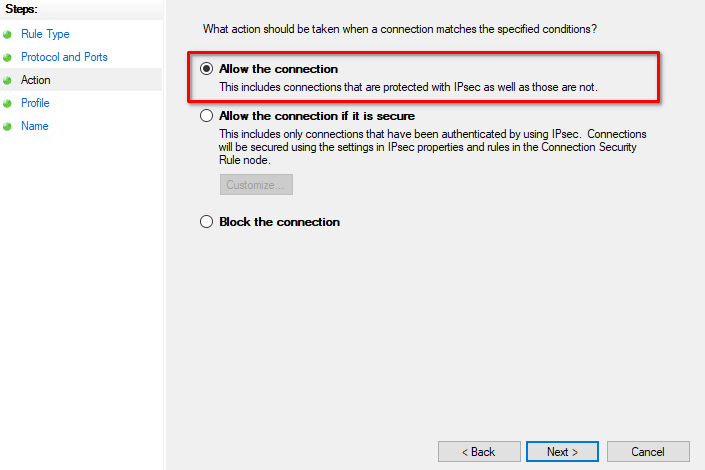
Let’s define what the rule will do. Tick on Allow the connection and proceed with the Next button:
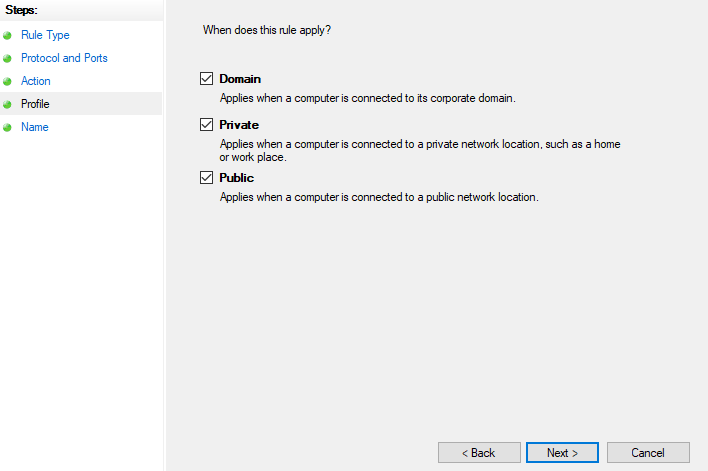
Tick every point that applied to your security policies and press the Next button:
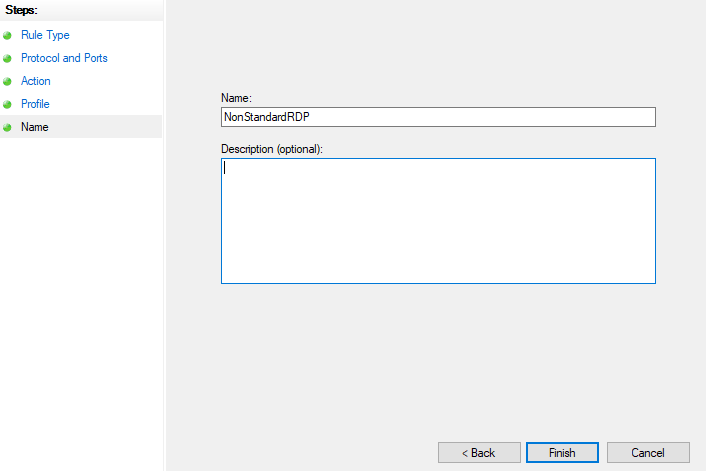
Let’s name the new rule: NonStandardRDP and save it with the Finish button:
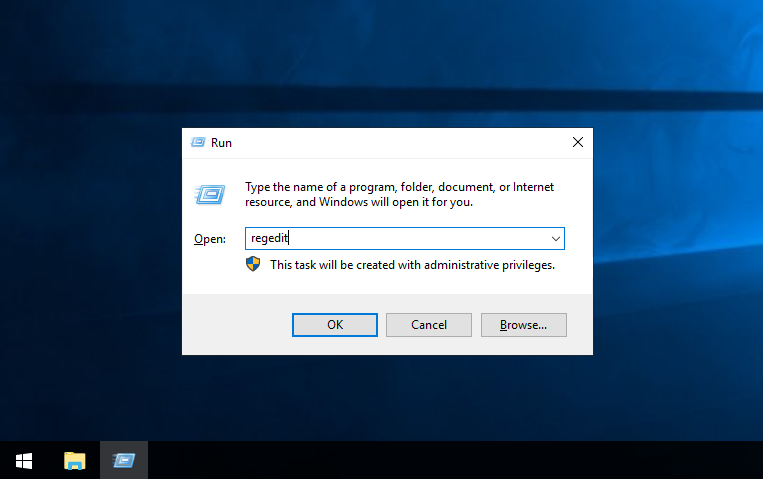
New rule was successfully created and we can change our default RDP port. You can’t use the graphical interface to change the RDP port. Instead, you need to access the registry editor and modify the corresponding value there. Use Win + R keyboard shortcut to open command window, type regedit and confirm with the OK button:
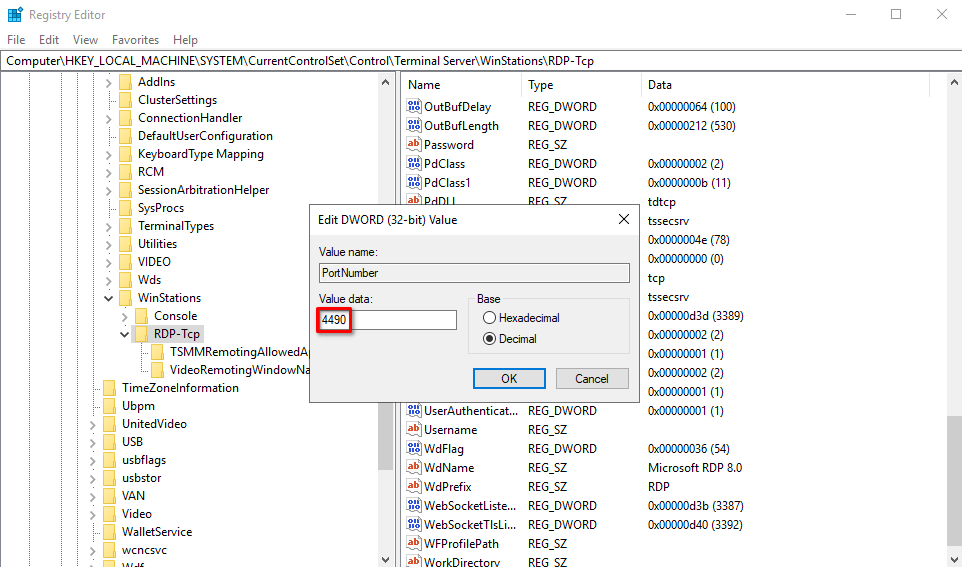
In the open registry editor, you need to open the following branches in sequence:
HKEY_LOCAL_MACHINE\SYSTEM\CurrentControlSet\Control\Terminal Server\WinStations\RDP-Tcp
Please find and double-click on the PortNumber string:

The hexadecimal representation of numbers is enabled by default. Click on Decimal, type the new port number in the Value data field, and confirm with OK:
Now, you can close the registry editor and proceed with rebooting the server. After that, you can connect to the new RDP port.
Allow access from certain IPs
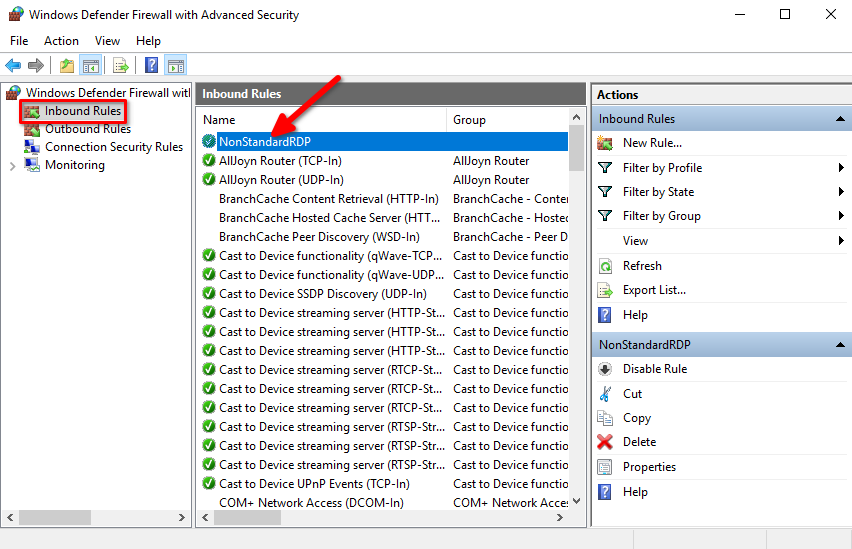
Now, let’s enhance security measures by allowing connections only from certain IP addresses. Connections from other addresses will be dropped. Open the list of incoming rules again, as per the instructions above, and find our previously created rule named NonStandardRDP that allows connections to port 4490. Double-click on it to open properties window:
Click on Scope, tick These IP addresses, and click the Add button:
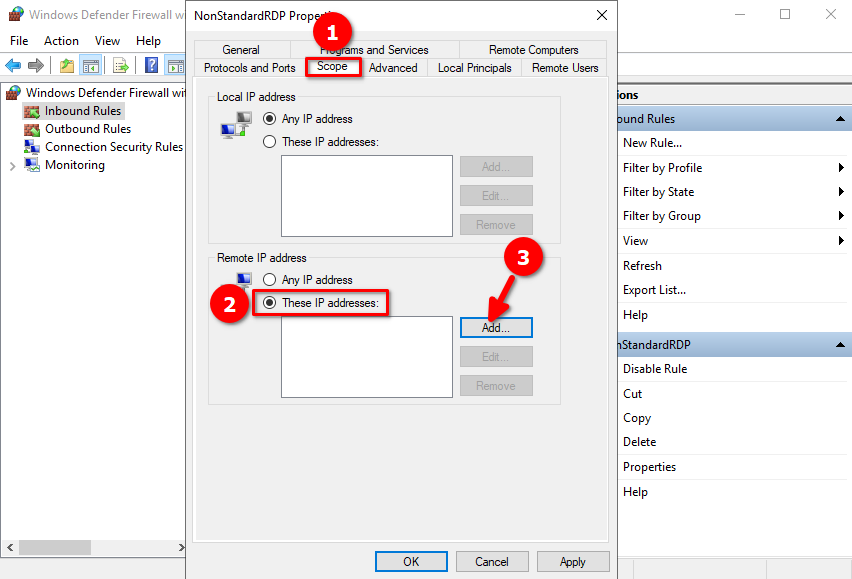
You can type a specific IP address or an entire subnet of IPs from which to allow connections, and then click OK:

Confirm the rule change again with OK. Now, you can connect to the server using RDP only from specific addresses. In addition to finding the correct port number, attackers will also have to spoof the source IP address.
See also:
Updated: 04.01.2026
Published: 24.06.2024