


How to get access to Leadergpu®.com server with 4x GTX 1080 and Windows® Server 2016

1. Go to Leadergpu®.com

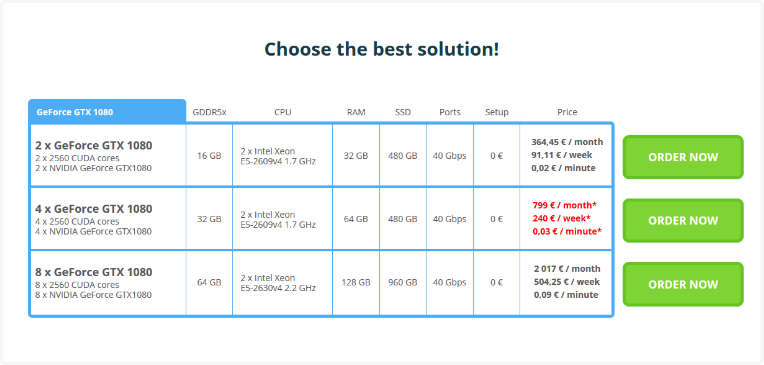
2. Choose required configuration from available on the website. We will select a configuration with 4 cards for this example.
3. Fill in the "First name", "Last name", "Email", "Phone", "Billing type" fields.
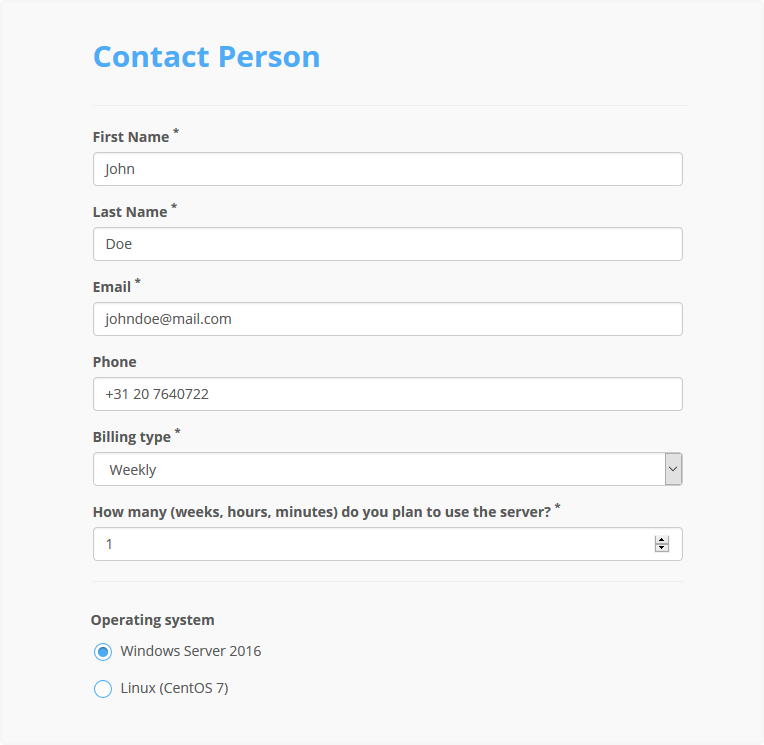
If you choose weekly / hourly / per minute payments, you are also required to specify server usage period, as shown on the screenshot above.
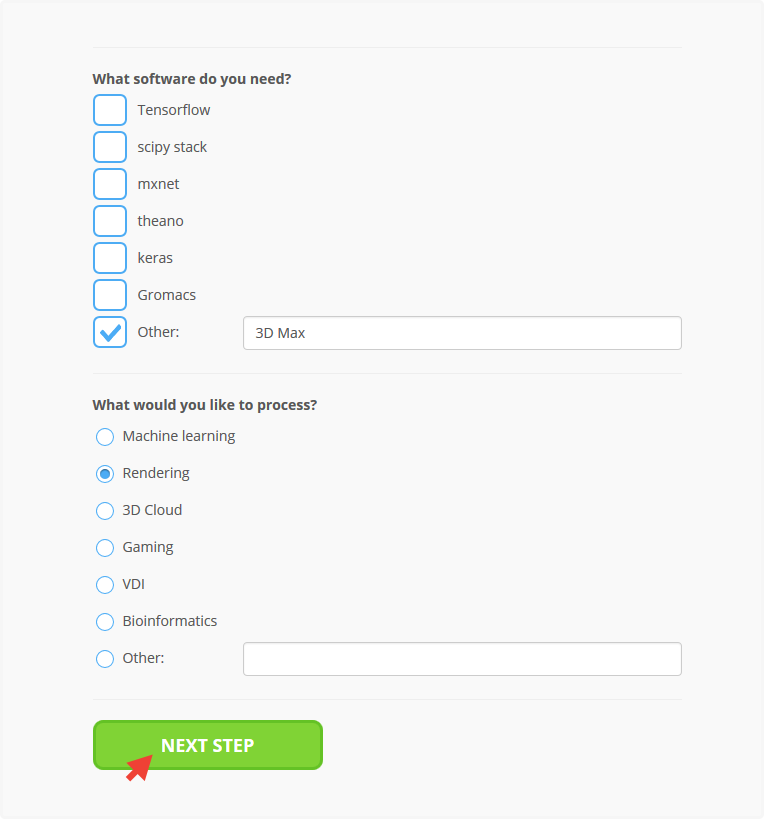
4. Choose software that will be installed / used on the server. If your software is not on the list, you can specify your own software components required for installation in the "other" field.
Choose the area in which you will work, and press the "Next Step".
5. Now you need fill in personal details of a person who is making the order (legal or physical).
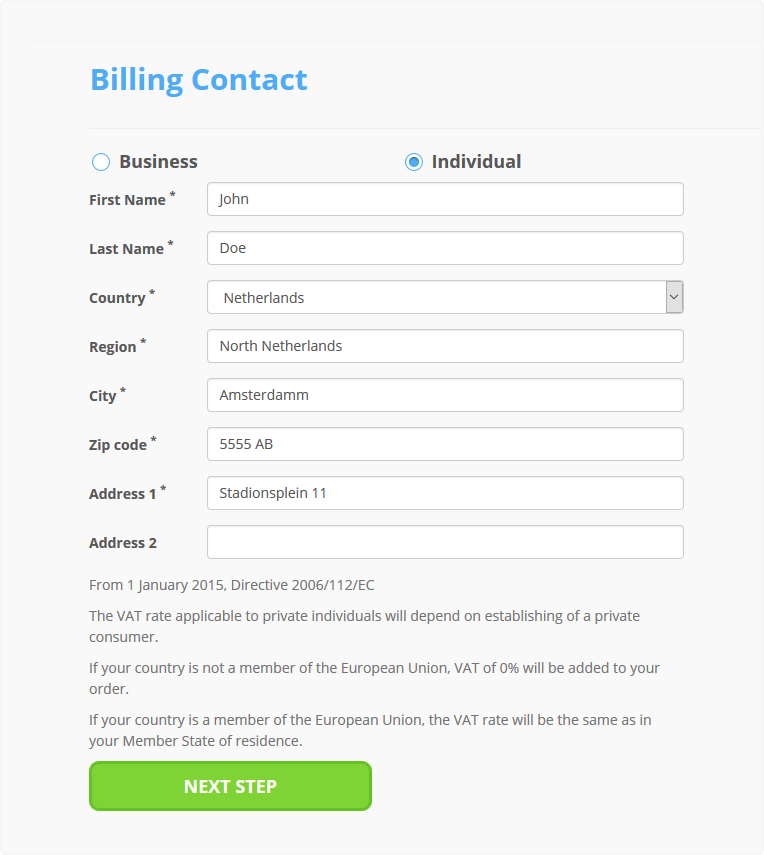
6. Please, fill in required fields in the form: select the country, region, and city, provide your index and street and click the "Next step" button.

7. Next, would be a payment options page. Please select a convenient method of payment, complete your payment and you will receive an e-mail with login credentials for your personal account.
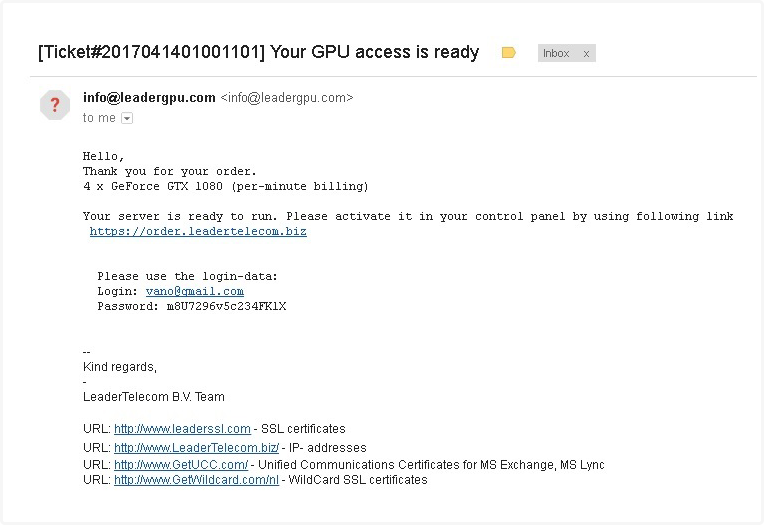
8. Simply follow the link in the e-mail received and you will be transferred into your account.
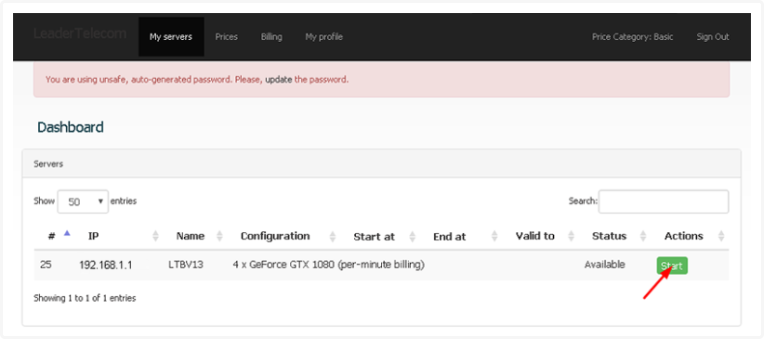
Here you can find address of your server, type of server, start date and end date of the session, as well as the availability status. The server is currently available, so we click the "start" button and launching the installation process of operation system, which we previously indicated.
Please note: The time you've paid for begins only after OS installation. OS installation time takes about 10-15 minutes and is FREE OF CHARGE. So please rest assured that when the server is installing OS, it's absolutely free for you!
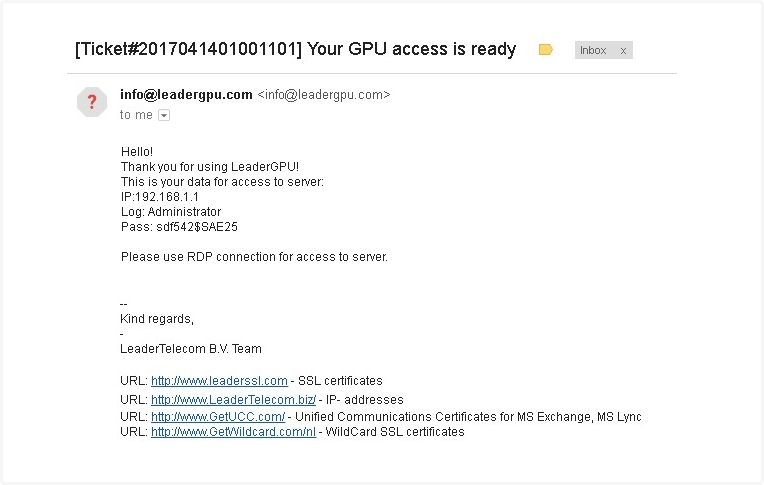
9. After the installation of the operating system is over, you will receive an email with IP address, login and password for the RDP connection.
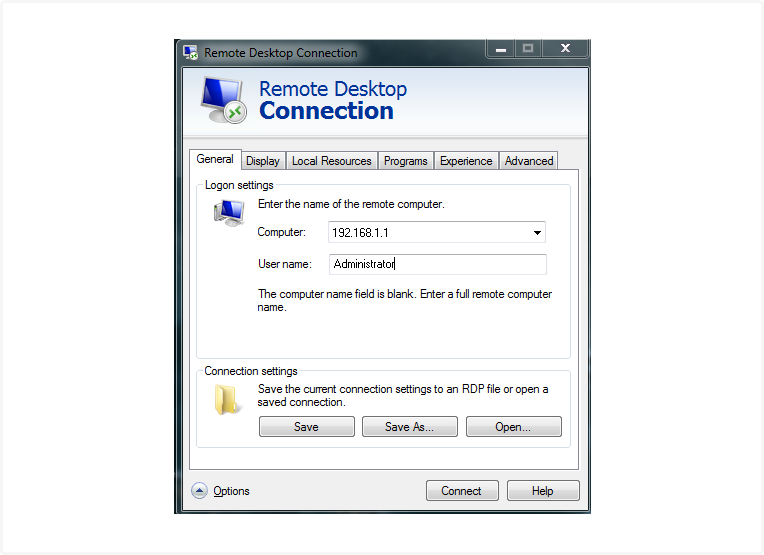
10. Open RDP client, enter your IP, login and password, and connect to the server!
Done! Now you can start working!
Updated: 03.05.2023
Published: 18.04.2017