


AudioCraft by MetaAI: create music by description
Modern generative neural networks are becoming smarter. They are writing stories, engaging in conversations with people, and creating ultra-realistic images. Now, they can produce simple music tracks without the need for professional artists. This future has become a reality today. It’s expected, as musical harmonies and rhythms are rooted in mathematical principles.
Meta has demonstrated its commitment to the world of open-source software. They have placed three neural network models publicity available that enable the creation of sounds and music from text descriptions:
- MusicGen — generates music from text.
- AudioGen — generates audio from text.
- EnCodec — high quality neural audio compressor.
MusicGen was trained on 20,000 hours of music. You can utilize it locally via dedicated LeaderGPU servers as a platform.
Standard installation
Update the package cache repository:
sudo apt update && sudo apt -y upgradeInstall the Python package manager, pip, and the ffmpeg libraries:
sudo apt -y install python3-pip ffmpegInstall torch 2.0 or newer using pip:
pip install 'torch>=2.0'The next command automatically installs audiocraft and all necessary dependencies:
pip install -U audiocraftLet’s write a simple Python app, using the large pre-trained MusicGen model with 3.3B parameters:
nano generate.pyfrom audiocraft.models import MusicGen
from audiocraft.data.audio import audio_write
model = MusicGen.get_pretrained("facebook/musicgen-large")
model.set_generation_params(duration=30) # generate a 30 seconds sample.
descriptions = ["rock solo"]
wav = model.generate(descriptions) # generates sample.
for idx, one_wav in enumerate(wav):
# Will save under {idx}.wav, with loudness normalization at -14 db LUFS.
audio_write(f'{idx}', one_wav.cpu(), model.sample_rate, strategy="loudness")Execute the created app:
python3 generate.pyAfter a few seconds, the generated file (0.wav) will appear in the directory.
Coffee Vampir 3
Clone a project repository:
git clone https://github.com/CoffeeVampir3/audiocraft-webui.gitOpen the cloned directory:
cd audiocraft-webuiRun command that prepares your system and installs all necessary packages:
pip install -r requirements.txtThen, run the Coffee Vampire 3 server with the following command:
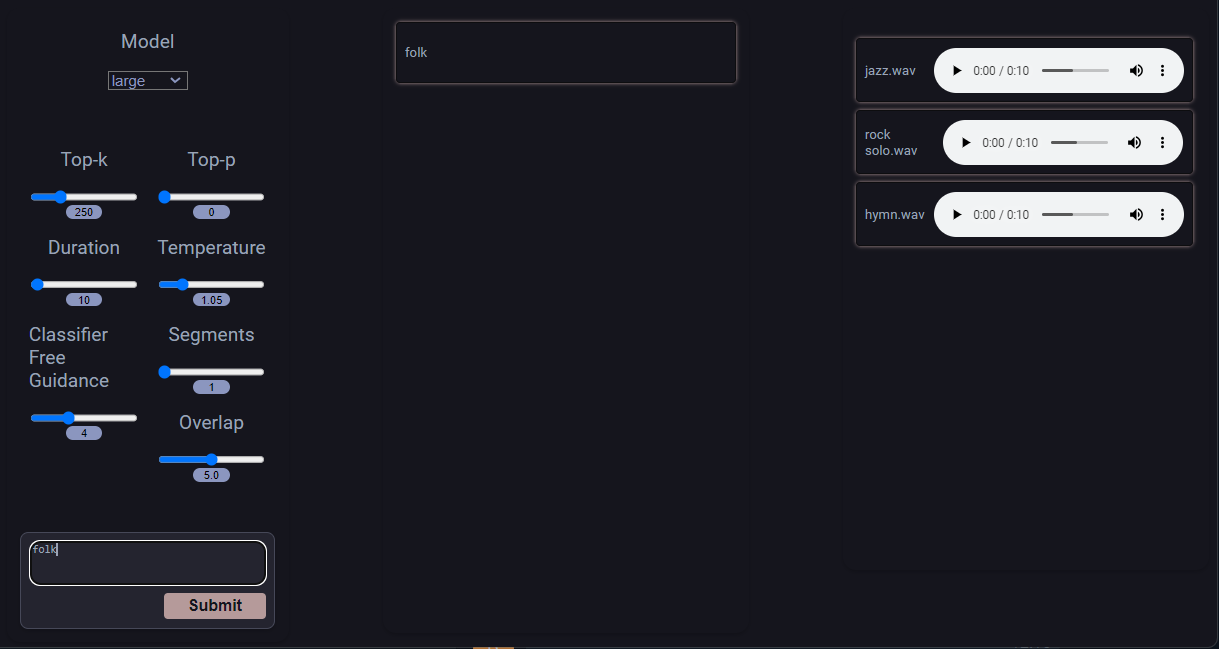
python3 webui.pyCoffee Vampire 3 uses Flask as a framework. By default, it runs on localhost with port 5000. If you want remote access, please use the port forwarding feature in your SSH client. Otherwise, you can organize VPN-connection to the server.
Attention! This is a potentially dangerous action; use at your own risk:
nano webui.pyScroll down to the end and replace socketio.run(app) to socketio.run(app, host=’0.0.0.0’, port=5000)
Save the file and run the server using the command above. This allows access to the server from the public internet without any authentication.
Don’t forget to disable AdBlock software, as it can block the music player on the right side of the webpage. You can start by entering the prompt and confirming with the Submit button:
TTS Generation WebUI
Step 1. Drivers
Update the package cache repository:
sudo apt update && sudo apt -y upgradeInstall NVIDIA® drivers using automatic installer or our guide Install NVIDIA® drivers in Linux:
sudo ubuntu-drivers autoinstallReboot the server:
sudo shutdown -r nowStep 2. Docker
The next step is to install Docker. Let’s install some packages that need to be added to the Docker repository:
sudo apt -y install apt-transport-https curl gnupg-agent ca-certificates software-properties-commonDownload the Docker GPG key and store it:
curl -fsSL https://download.docker.com/linux/ubuntu/gpg | sudo apt-key add -Add the repository:
sudo add-apt-repository "deb [arch=amd64] https://download.docker.com/linux/ubuntu focal stable"Install Docker CE (Community Edition) with CLI and the containerd runtime:
sudo apt -y install docker-ce docker-ce-cli containerd.ioAdd the current user to the docker group:
sudo usermod -aG docker $USERApply changes without the logout and login procedure:
newgrp dockerStep 3. GPU passthrough
Let’s enable NVIDIA® GPUs passthrough in Docker. The following command reads the current OS version into the distribution variable, which we can use in the next step:
distribution=$(. /etc/os-release;echo $ID$VERSION_ID)Download the NVIDIA® repository GPG key and store it:
curl -s -L https://nvidia.github.io/nvidia-docker/gpgkey | sudo apt-key add -Download the NVIDIA® repos list and store it for use in the standard APT package manager:
curl -s -L https://nvidia.github.io/nvidia-docker/$distribution/nvidia-docker.list | sudo tee /etc/apt/sources.list.d/nvidia-docker.listUpdate the package cache repository and install the GPU passthrough toolkit:
sudo apt-get update && sudo apt-get install -y nvidia-container-toolkitRestart the Docker daemon:
sudo systemctl restart dockerStep 4. WebUI
Download the repository archive:
wget https://github.com/rsxdalv/tts-generation-webui/archive/refs/heads/main.zipUnpack it:
unzip main.zipOpen the project’s directory:
cd tts-generation-webui-mainStart building the image:
docker build -t rsxdalv/tts-generation-webui .Run the created container:
docker compose up -dNow you can open http://[server_ip]:7860, type your prompt, select the necessary model, and click the Generate button:
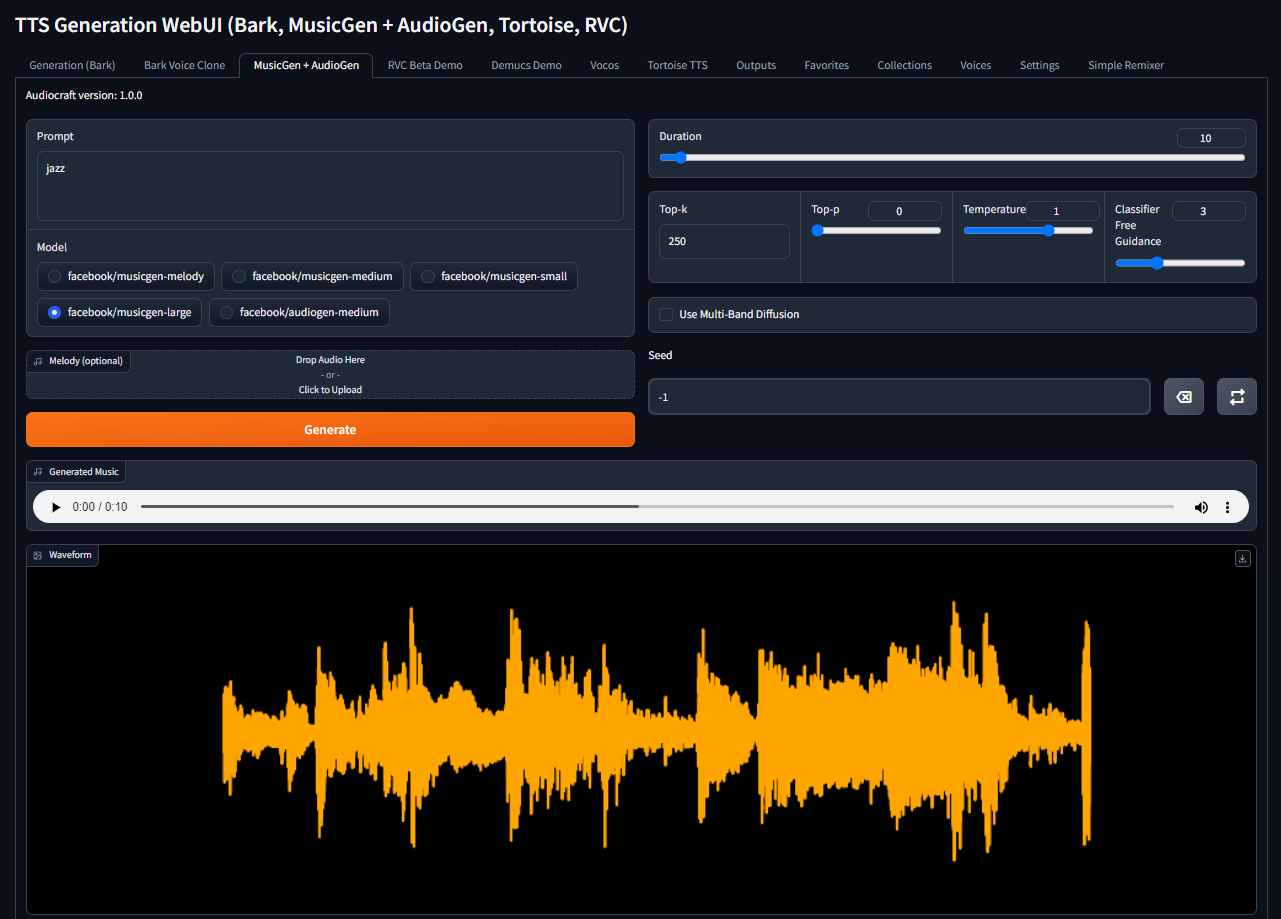
The system automatically downloads the selected model during the first generation. Enjoy!
See also:
Updated: 04.01.2026
Published: 22.01.2025


