


Stable Diffusion: LoRA selfie

You can create your first dataset using a simple camera and a fairly uniform background, such as a white wall or monotone blackout curtain. For a sample dataset, I used a mirrorless camera Olympus OM-D EM5 Mark II with 14-42 kit lenses. This camera supports remote control from any smartphone and a very fast continuous shooting mode.
I mounted the camera on a tripod and set the focus priority to face. After that, I selected the mode in which the camera captures 10 frames consecutively every 3 seconds and initiated the process. During the shooting process, I slowly turned my head in the selected direction and changed the direction after every 10 frames:
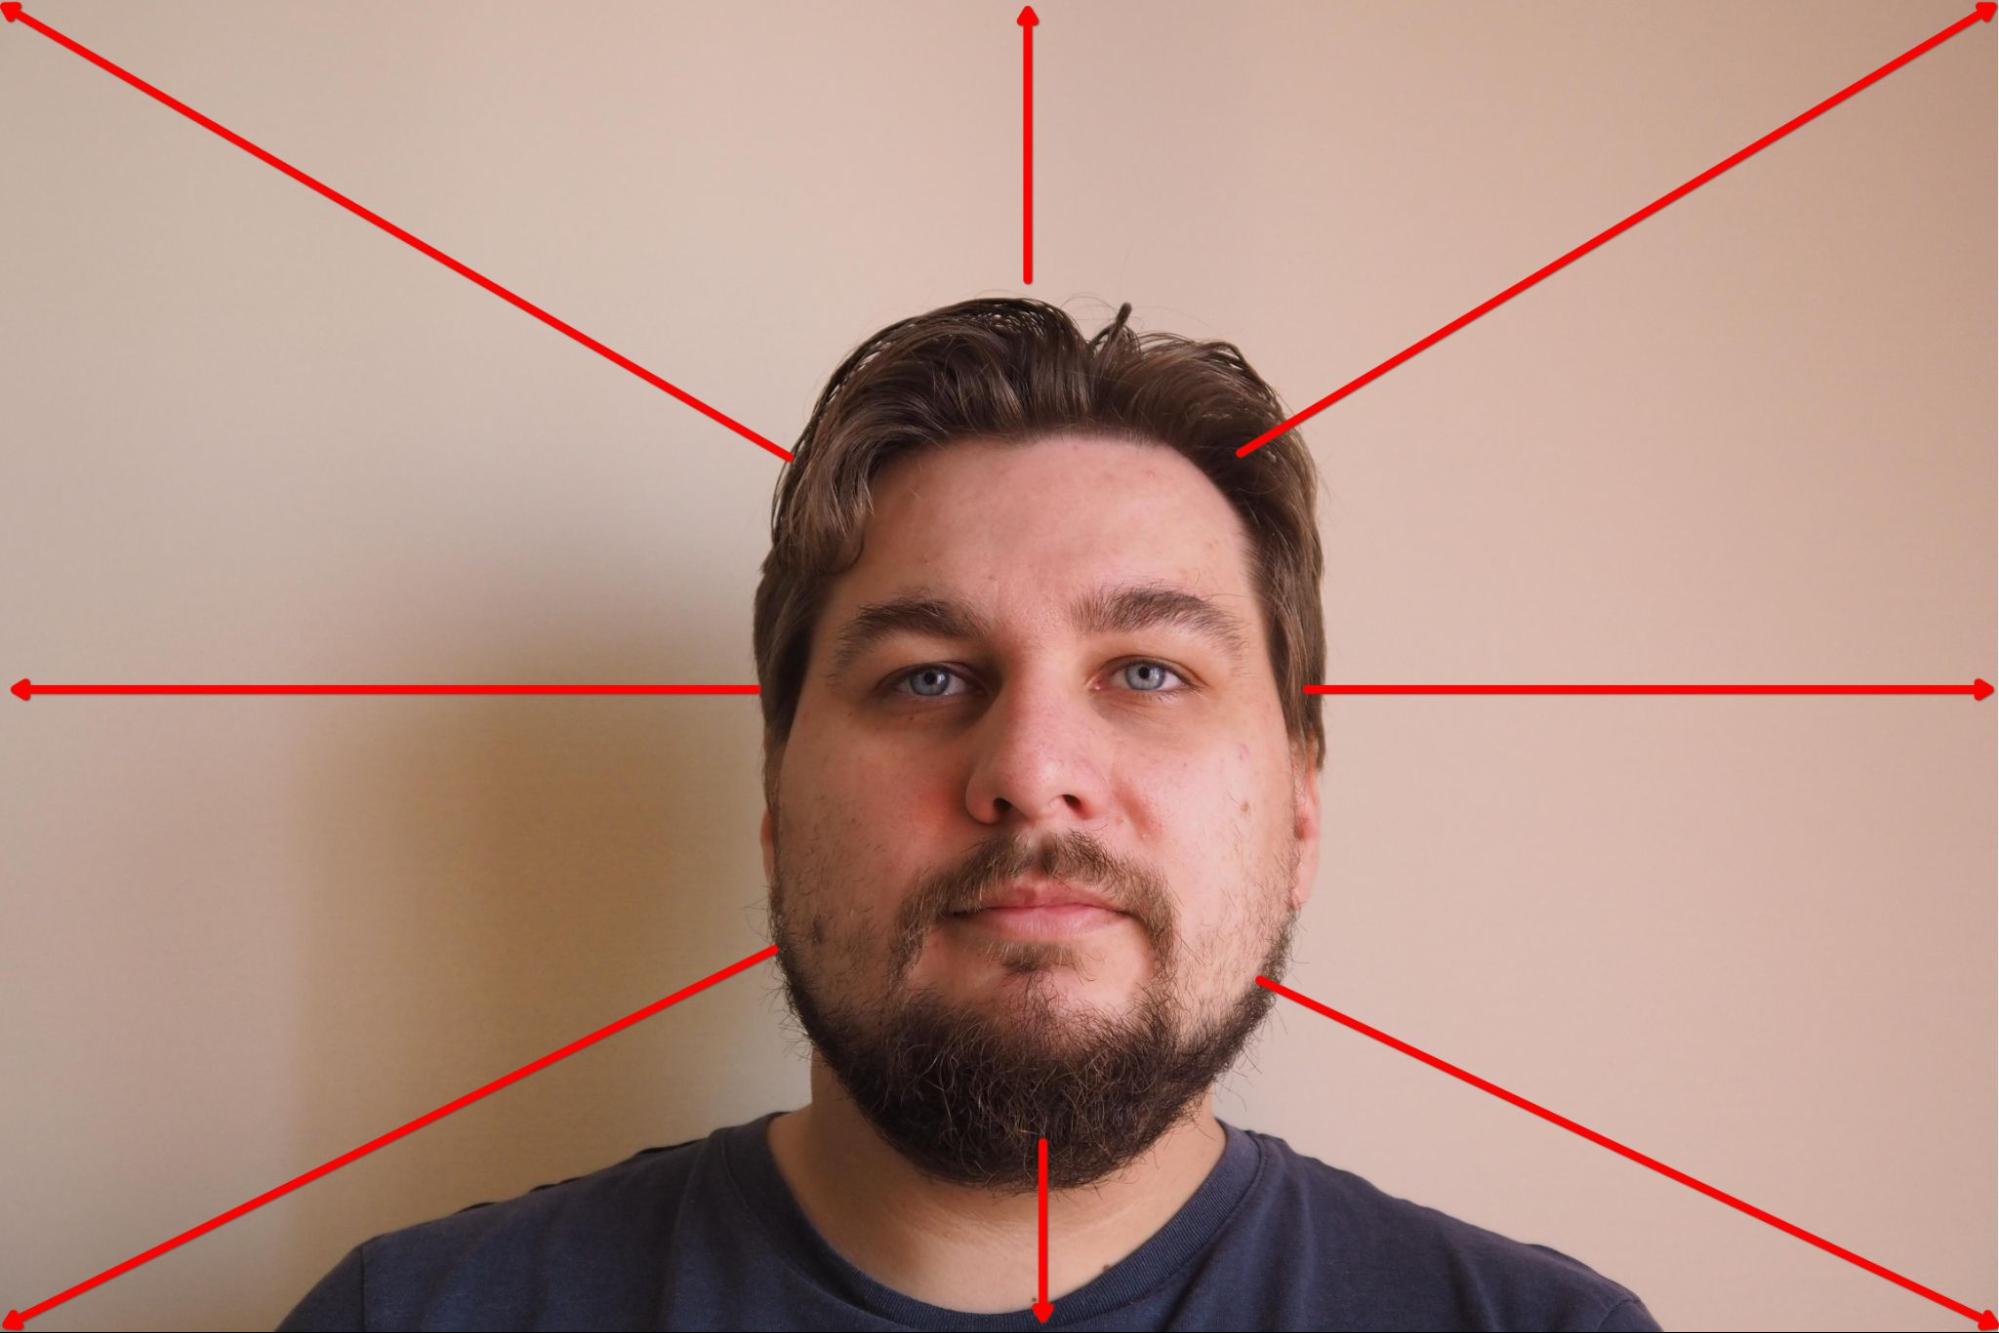
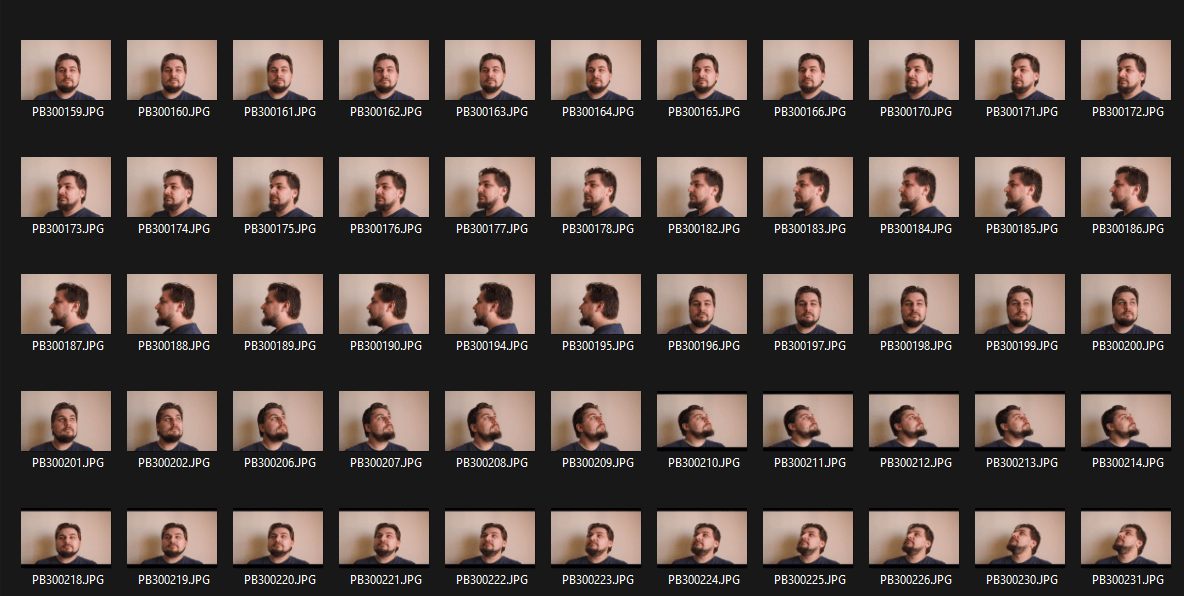
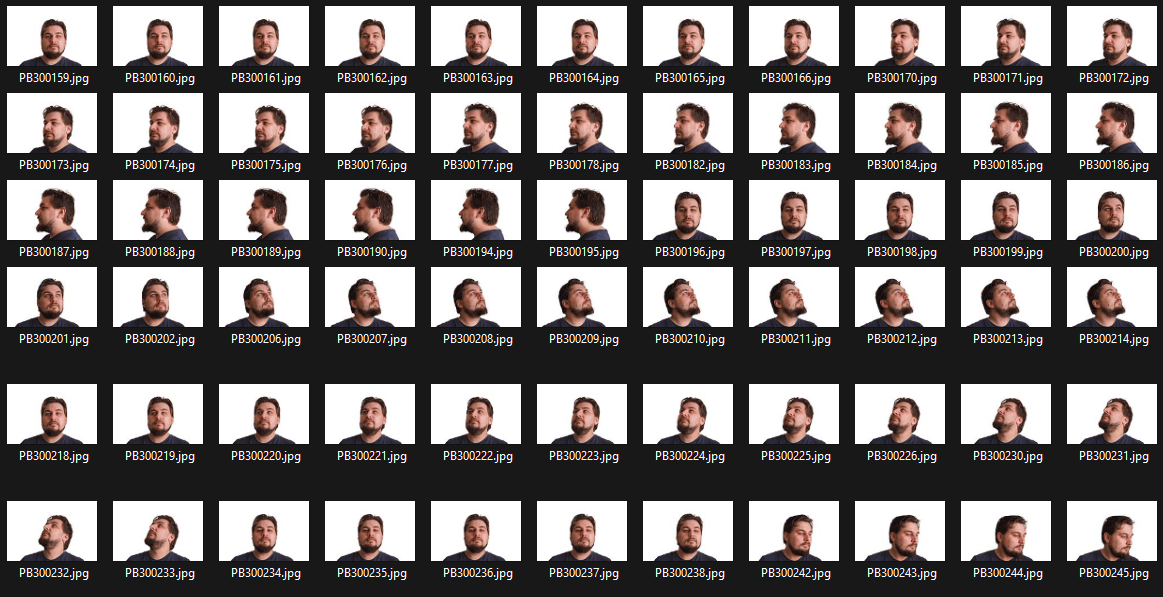
The result was around 100 frames with a monotone background:
The next step is to remove the background and leave the portrait on a white background.
Delete background
You can use standard Adobe Photoshop Remove background function and batch processing. Let’s store actions that we want to apply to every picture in a dataset. Open any image, click on the triangle icon, then click on the + symbol:
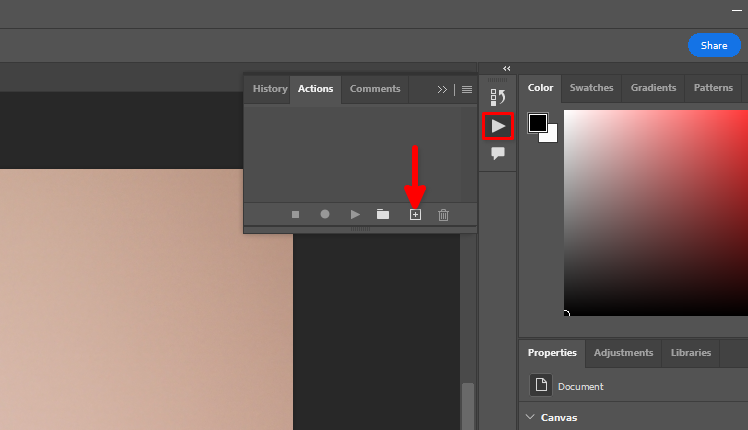
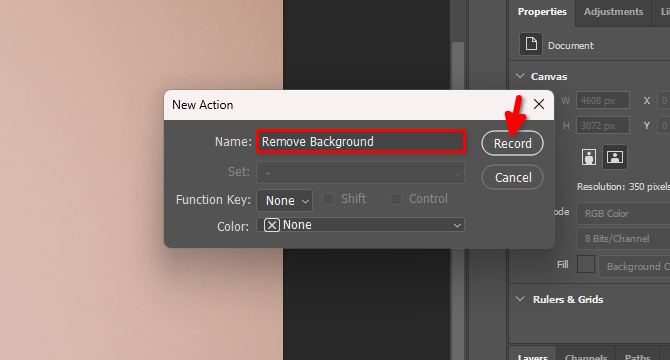
Type the name of the new action, for example, Remove Background and click Record:
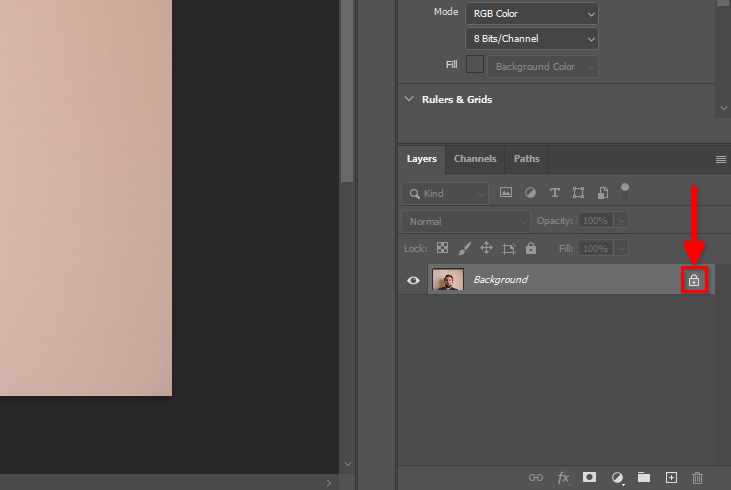
On the Layers tab, find the lock symbol and click on it:
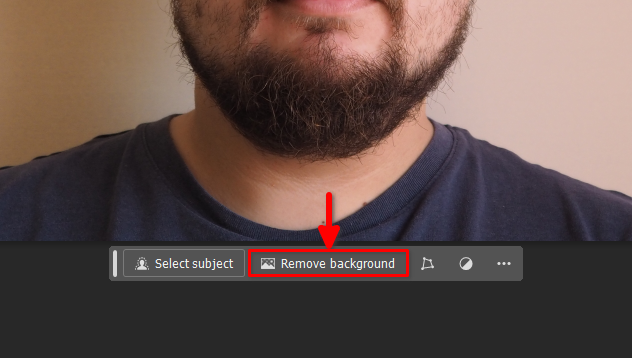
Next click on the Remove background button on the floating panel:
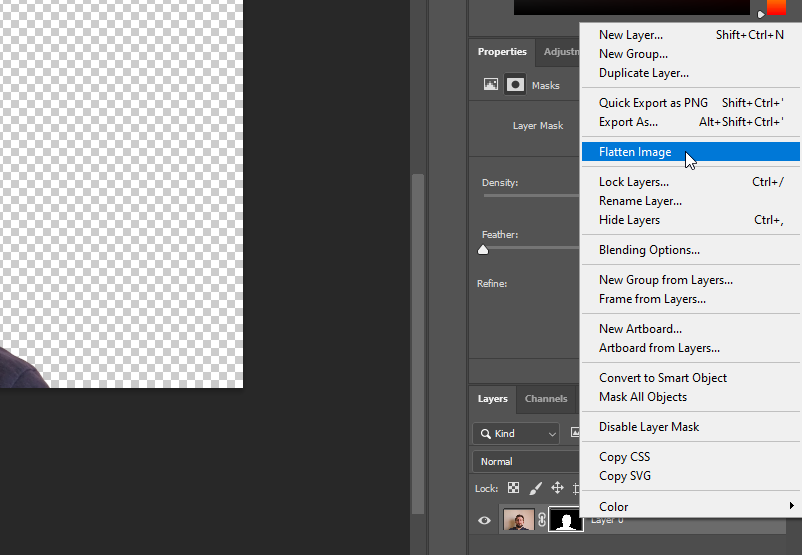
Right-click on Layer 0 and select Flatten Image:
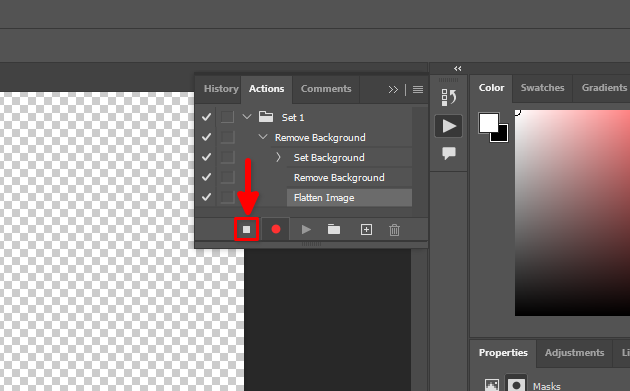
All our actions have been recorded. Let’s stop this process:
Now, you can close the open file without saving changes and select File >> Scripts >> Image Processor…

Select input and output directories, choose the created Remove Background action in step 4 and click on Run button:
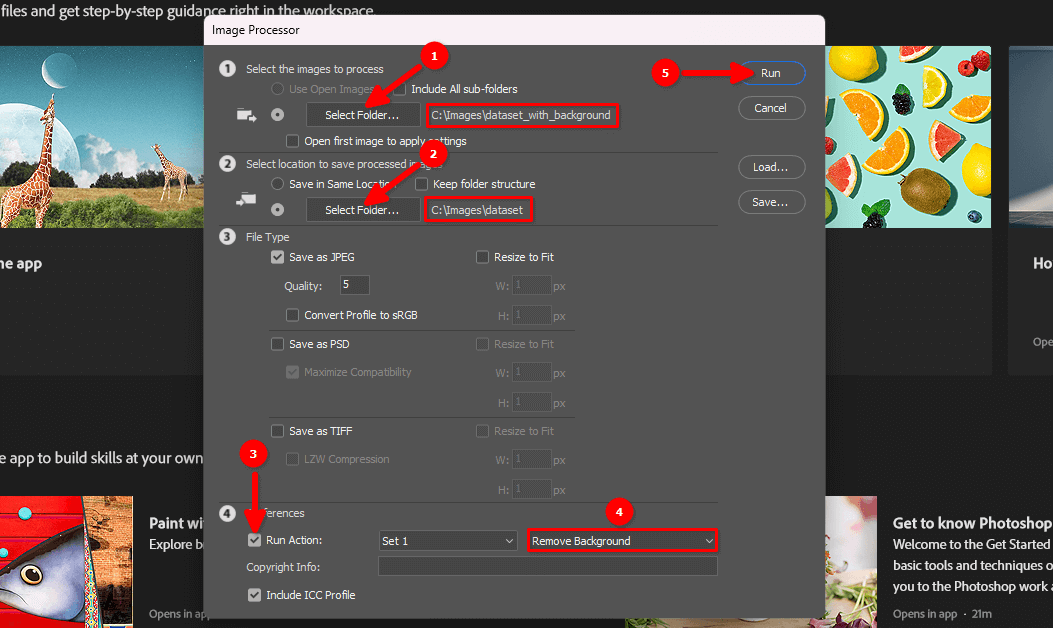
Please be patient. Adobe Photoshop will open every picture in the selected directory, repeat the recorded actions (turn off layer lock, delete background, flatten image) and save it in another selected directory. This process can take a couple of minutes, depending on the number of images.
When the process is finished, you can go to the next step.
Upload to server
Use one of the following guides (tailored to your PC operating system) to upload the dataset directory to the remote server. For example, place it in the default user’s home directory, /home/usergpu:
Pre-installation
Update existing system packages:
sudo apt update && sudo apt -y upgradeInstall two additional packages:
sudo apt install -y python3-tk python3.10-venvLet’s install the CUDA® Toolkit version 11.8. Let’s download the specific pin file:
wget https://developer.download.nvidia.com/compute/cuda/repos/ubuntu2204/x86_64/cuda-ubuntu2204.pinThe following command places the downloaded file into the system directory, which is controlled by the apt package manager:
sudo mv cuda-ubuntu2204.pin /etc/apt/preferences.d/cuda-repository-pin-600Next step is to download the main CUDA® repository:
wget https://developer.download.nvidia.com/compute/cuda/11.8.0/local_installers/cuda-repo-ubuntu2204-11-8-local_11.8.0-520.61.05-1_amd64.debAfter that, proceed with the package installation using the standard dpkg utility:
sudo dpkg -i cuda-repo-ubuntu2204-11-8-local_11.8.0-520.61.05-1_amd64.debCopy the GPG keyring to the system directory. This will make it available for use by operating system utilities, including the apt package manager:
sudo cp /var/cuda-repo-ubuntu2204-11-8-local/cuda-*-keyring.gpg /usr/share/keyrings/Update system cache repositories:
sudo apt-get updateInstall the CUDA® toolkit using apt:
sudo apt-get -y install cudaAdd CUDA® to PATH. Open the bash shell config:
nano ~/.bashrcAdd the following lines at the end of the file:
export PATH=/usr/local/cuda/bin${PATH:+:${PATH}}
export LD_LIBRARY_PATH=/usr/local/cuda-11.8/lib64\
                         ${LD_LIBRARY_PATH:+:${LD_LIBRARY_PATH}}
Save the file and reboot the server:
sudo shutdown -r nowInstall trainer
Copy the Kohya project’s repository to the server:
git clone https://github.com/bmaltais/kohya_ss.gitOpen the downloaded directory:
cd kohya_ssMake the setup script executable:
chmod +x ./setup.shRun the script:
./setup.shYou’ll receive a warning message from the accelerate utility. Let’s resolve the issue. Activate the project’s virtual environment:
source venv/bin/activateInstall the missing package:
pip install scipyAnd manually configure the accelerate utility:
accelerate configBe careful, because activating an odd number of CPUs will cause an error. For example, if I have 5 GPUs, only 4 can be used with this software. Otherwise, an error will occur when the process starts. You can immediately check the new utility configuration by calling a default test:
accelerate testIf everything is okay, you’ll receive a message like this:
Test is a success! You are ready for your distributed training!
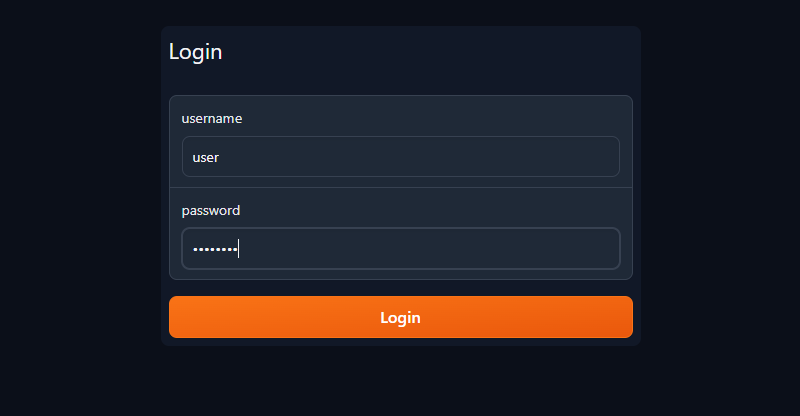
deactivateNow, you can initiate the trainer’s public server with Gradio GUI and simple login/password authentication (change the user/password to your own):
./gui.sh --share --username user --password passwordYou’ll receive two strings:
Running on local URL: http://127.0.0.1:7860
Running on public URL: https://.gradio.live
Open your web browser and enter the public URL in the address bar. Type your username and password in the appropriate fields, then click Login:
Prepare the dataset
Start by creating a new folder where you will store the trained LoRA model:
mkdir /home/usergpu/myloramodelOpen the following tabs: Utilities >> Captioning >> BLIP captioning. Fill in the gaps as shown in the picture and click Caption images:
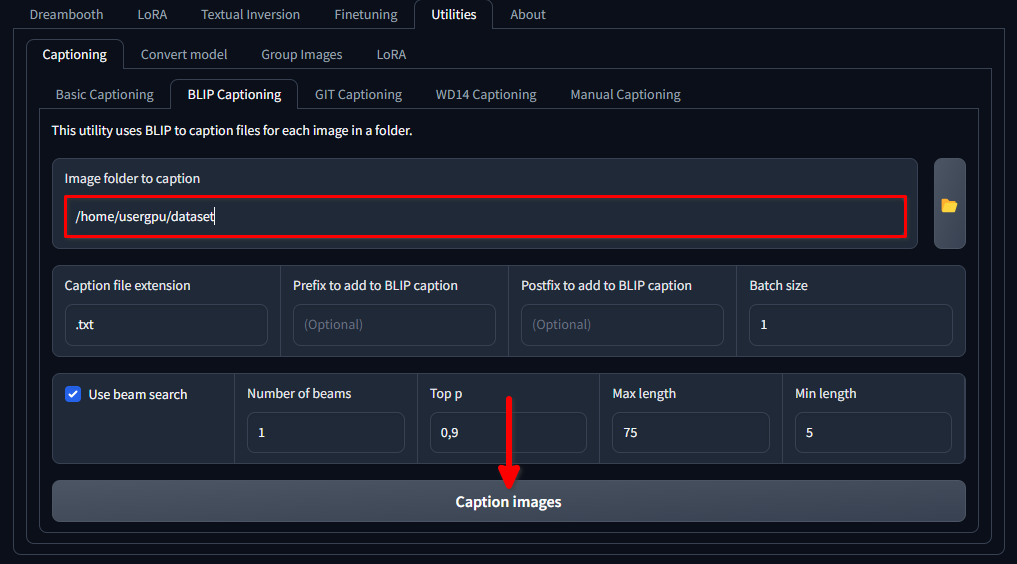
Trainer will download and run a specific neural network model (1.6 Gb) that creates text prompts for each image file in the selected directory. It will be executed on a single GPU and takes around a minute.
Switch tab to LoRA >> Tools >> Dataset preparation >> Dreambooth/LoRA folder preparation, fill in the gaps, and sequentially press Prepare training data and Copy info to Folders Tab:

In this example, we use the name nikolai as an Instance prompt and “person” as a Class prompt. We also set /home/usergpu/dataset as a Training Images and /home/usergpu/myloramodel as a Destination training directory.
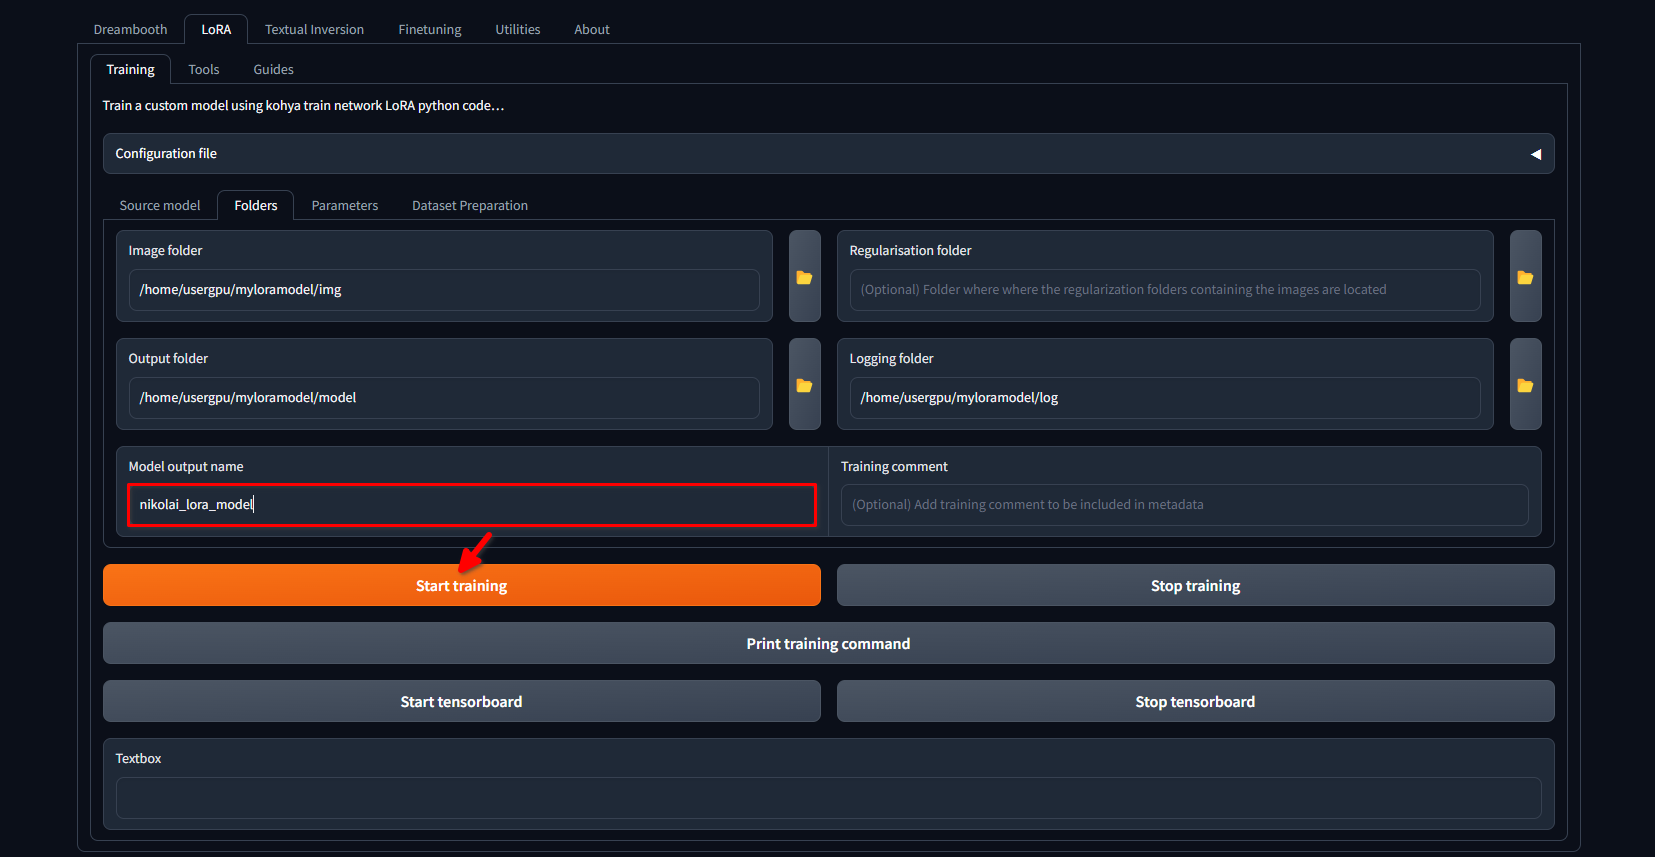
Switch to the LoRA >> Training >> Folders tab again. Ensure that the Image folder, Output folder, and Logging folder are correctly filled. If desired, you can change the Model output name to your own. Finally, click the Start training button:
The system will start downloading additional files and models (~10 GB). After that, the training process will begin. Depending on the quantity of images and the settings applied, this can take several hours. Once the training is completed, you can download the /home/usergpu/myloramodel directory to your computer for future use.
Test your LoRA
We’ve prepared some articles about Stable Diffusion and its forks. You can try to install Easy Diffusion with our guide Easy Diffusion UI. After the system was installed and is running, you can upload your LoRA model in SafeTensors format directly to /home/usergpu/easy-diffusion/models/lora
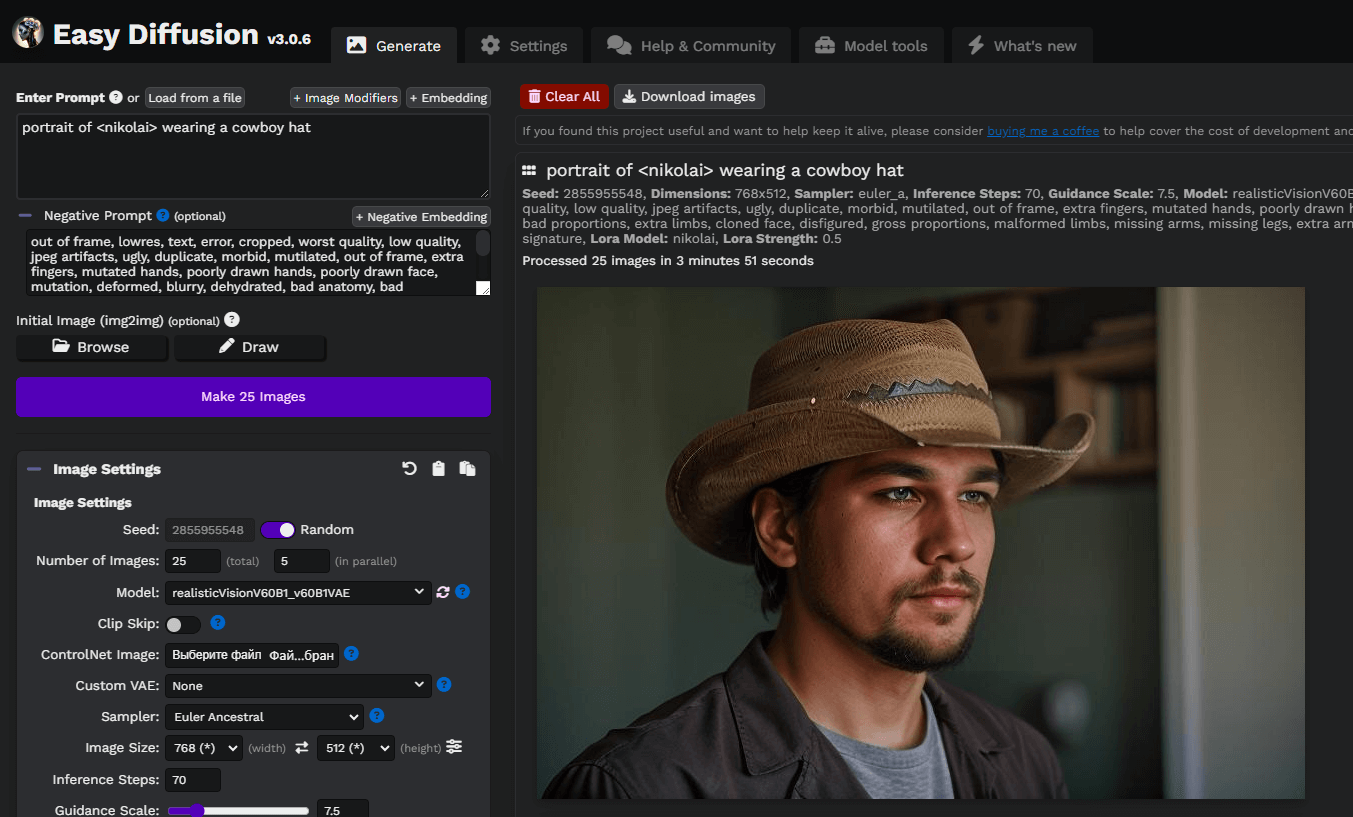
Update the Easy diffusion web page and select your model from the drop-down list:
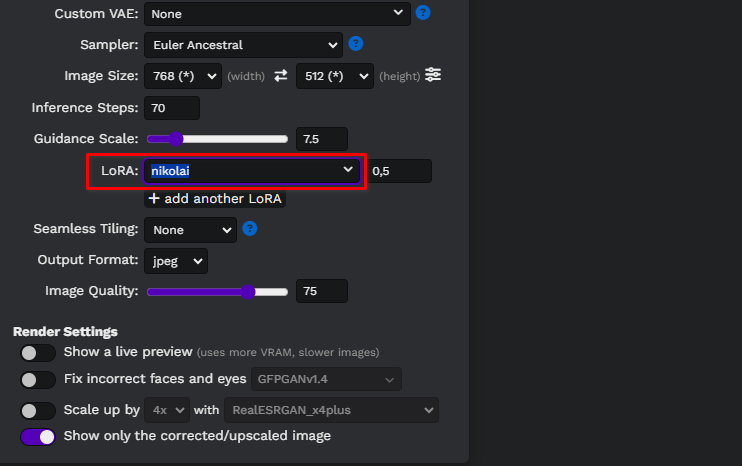
Let’s write a simple prompt, portrait of <nikolai> wearing a cowboy hat, and generate our first images. Here, we used a custom Stable Diffusion model downloaded from civitai.com: Realistic Vision v6.0 B1:
You can experiment with prompts and models, based on Stable Diffusion, to achieve better results. Enjoy!
See also:
Updated: 04.01.2026
Published: 21.01.2025


